UAV
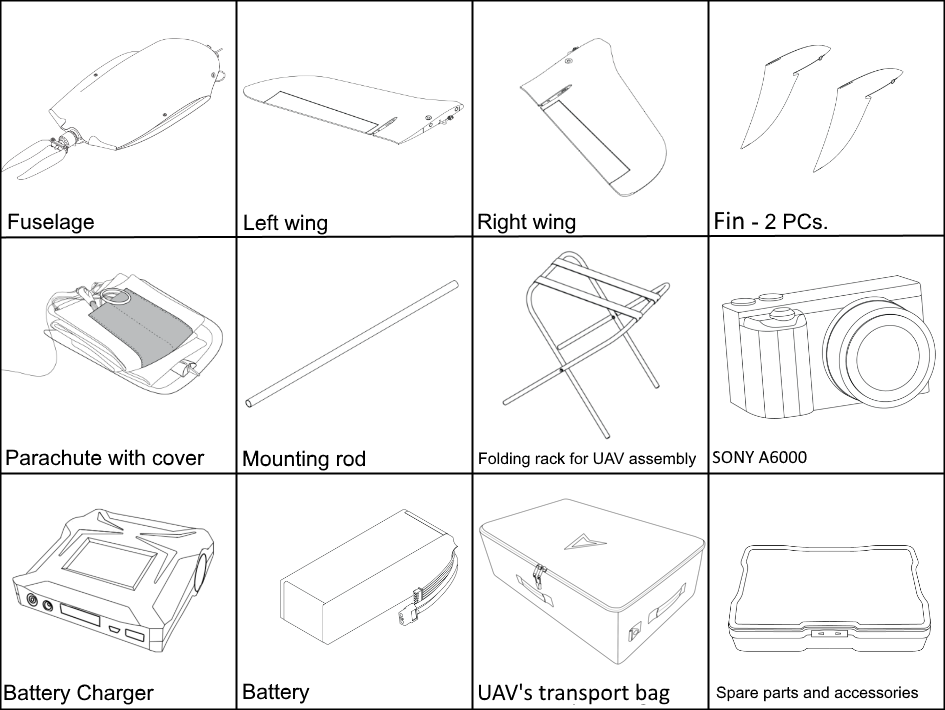
Parts
Assembly
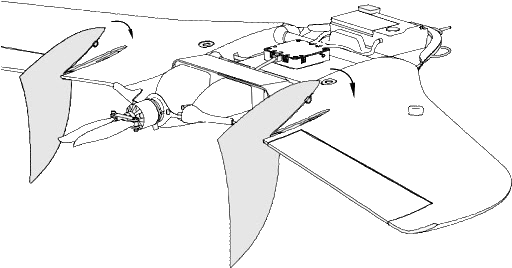
Take the wings and fuselage out from the UAV’s transport bag.
Place the parachute in the parachute compartment (see section Parachute system for details).
Remove the fuselage’s top cover. Unclasp the rubber locks to remove the fuselage’s top cover. Remove back of the cover from grooves.
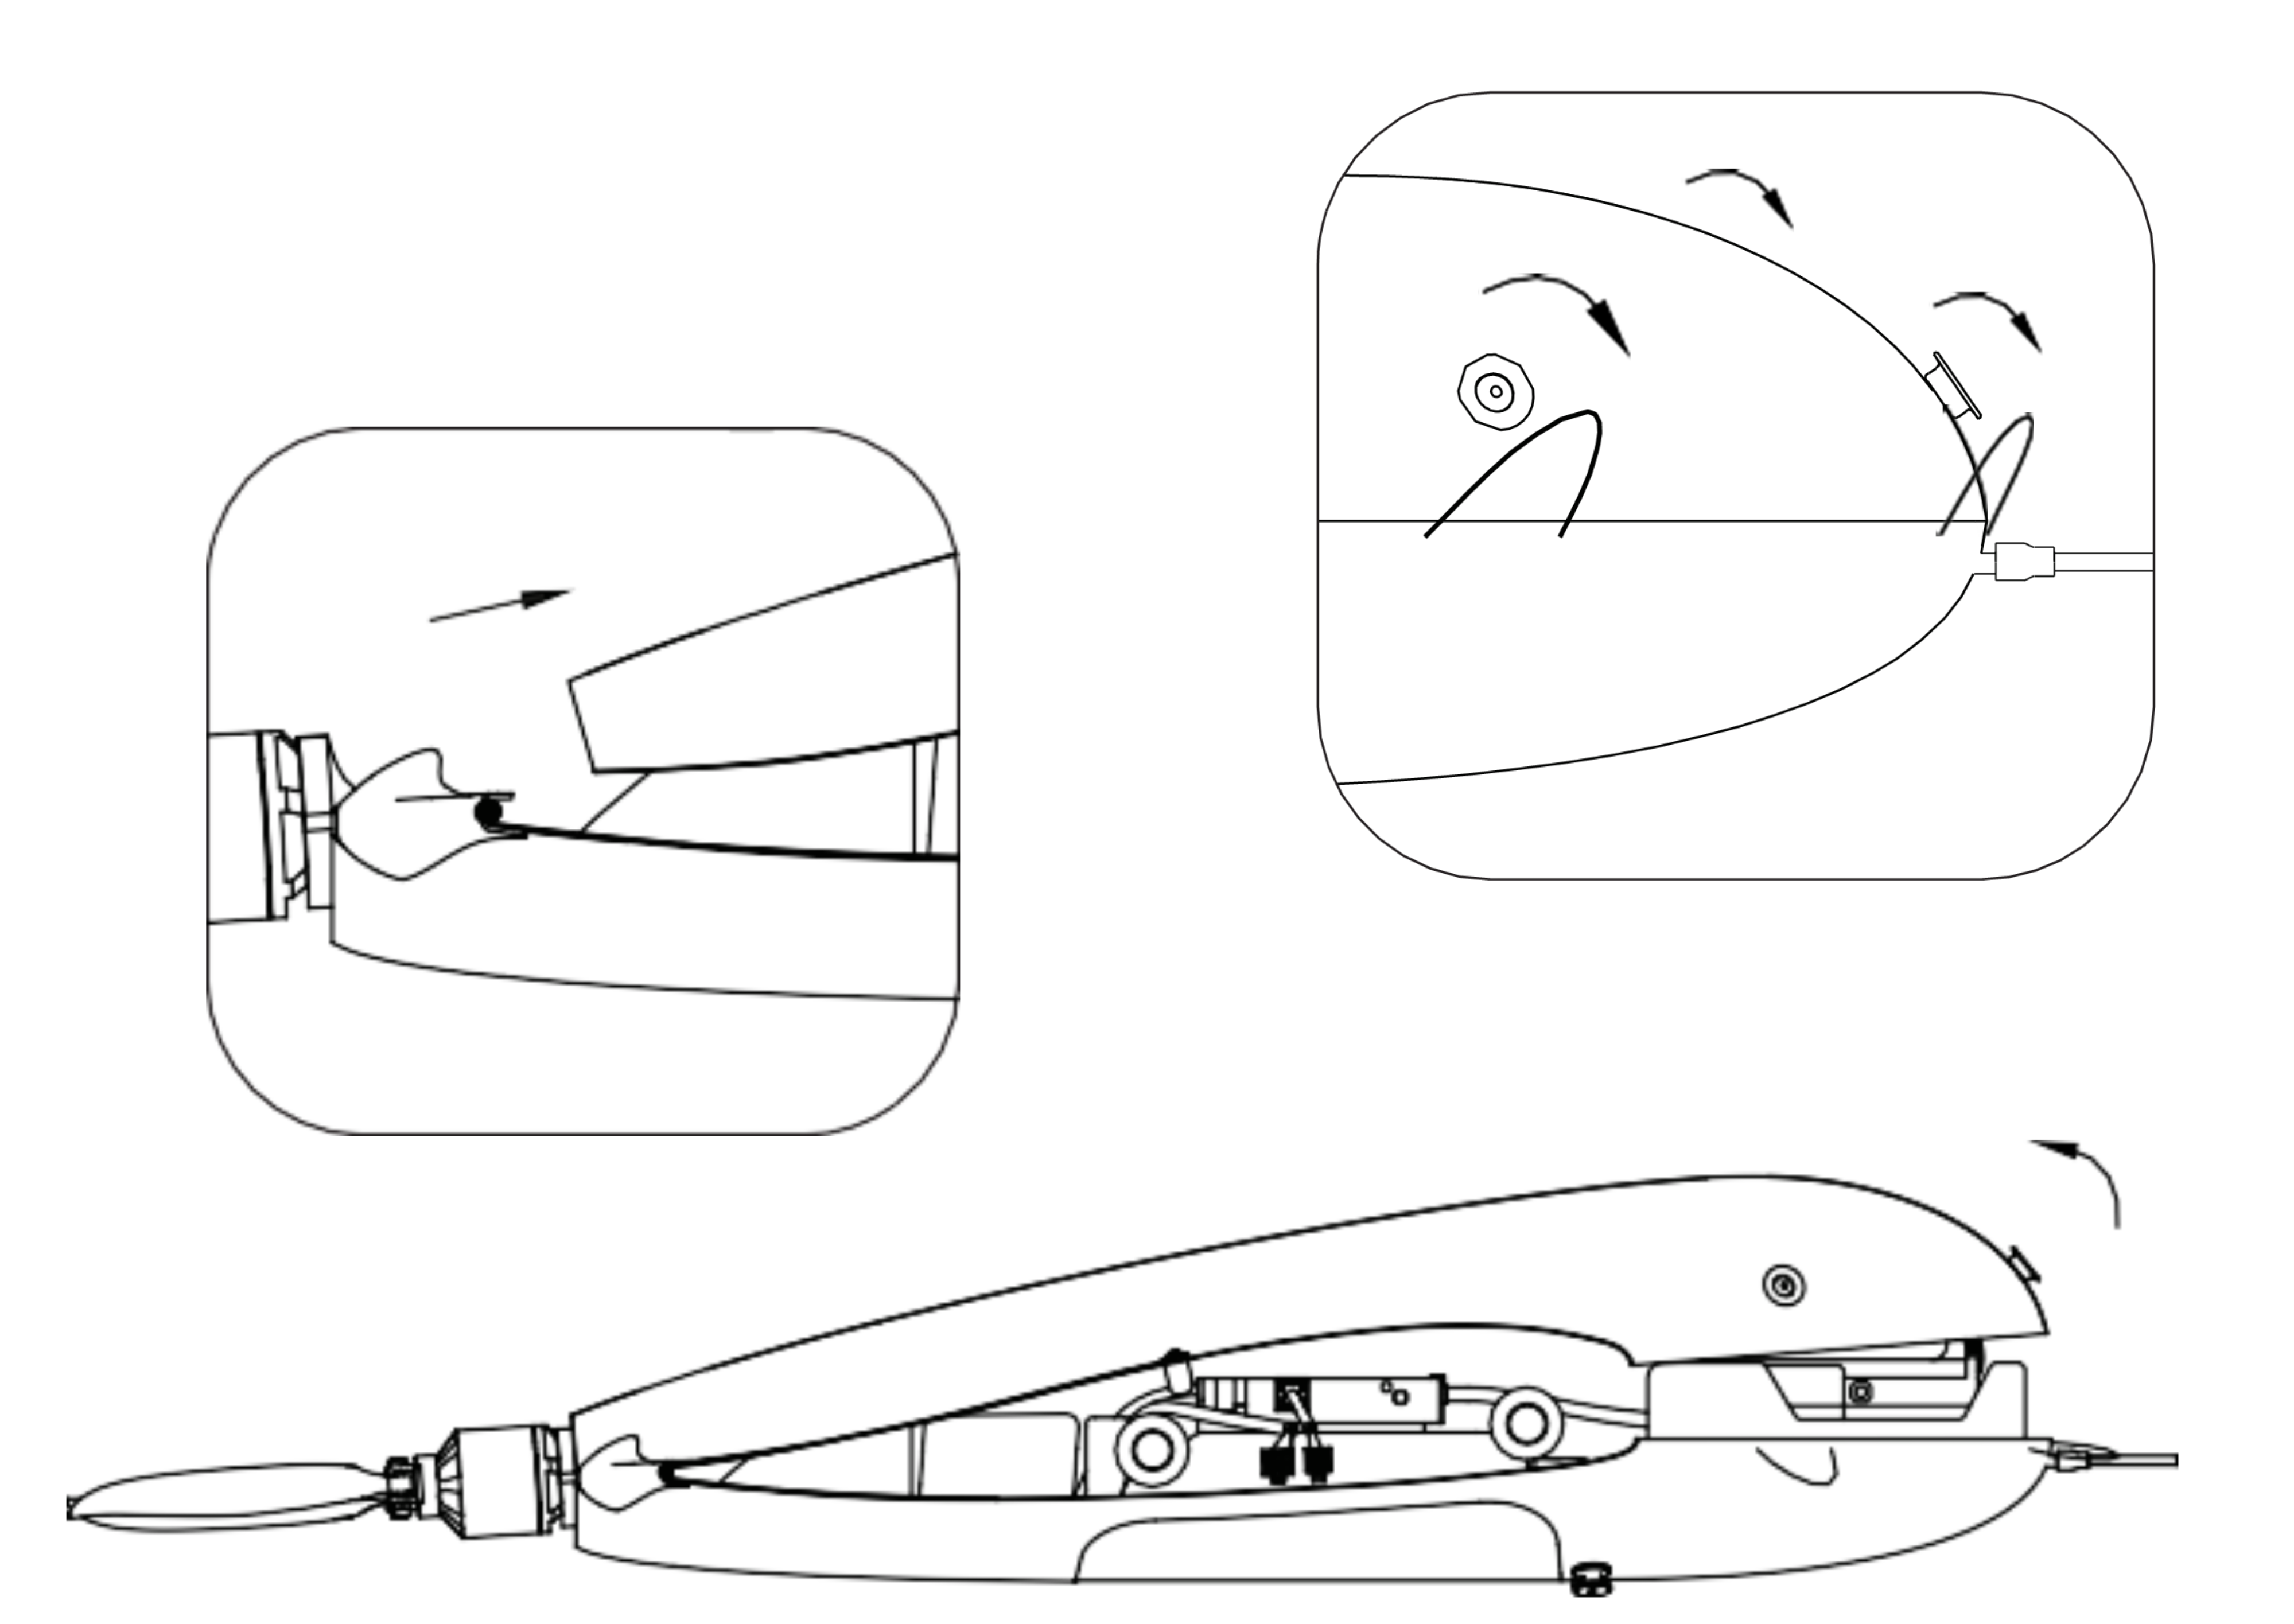
Removing the fuselage’s top cover
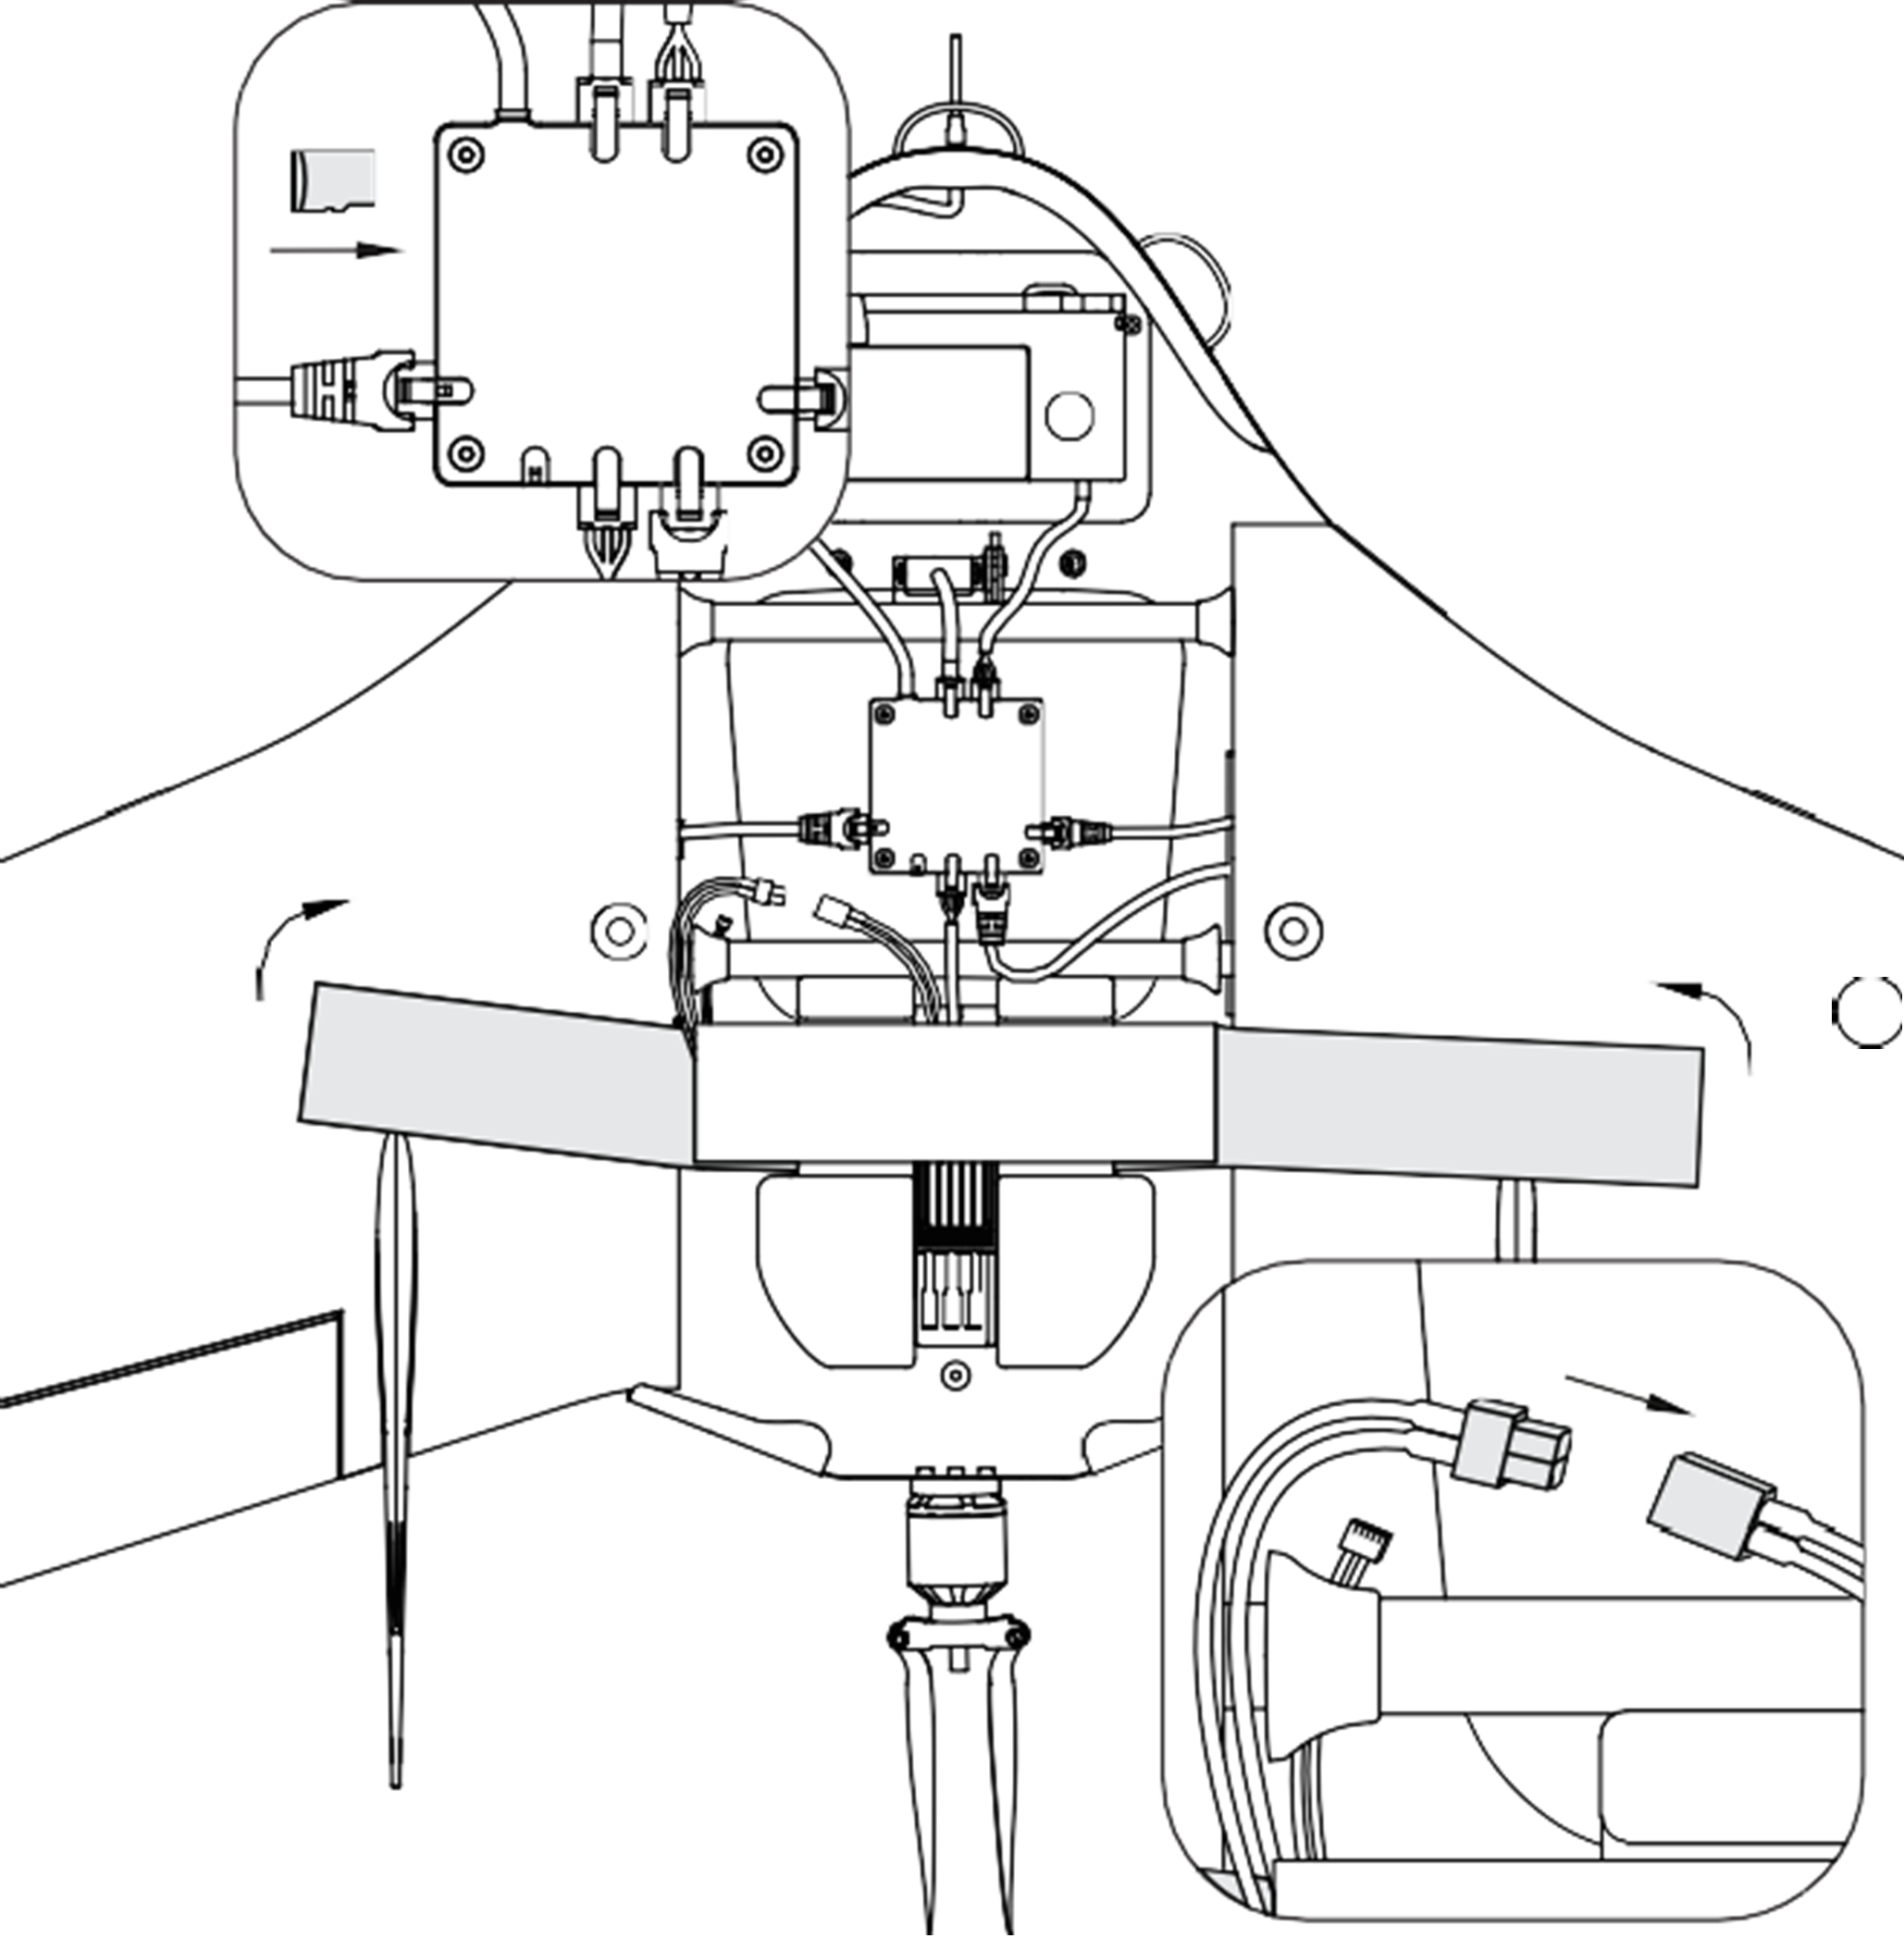
Insert mounting rod into the fuselage tube.
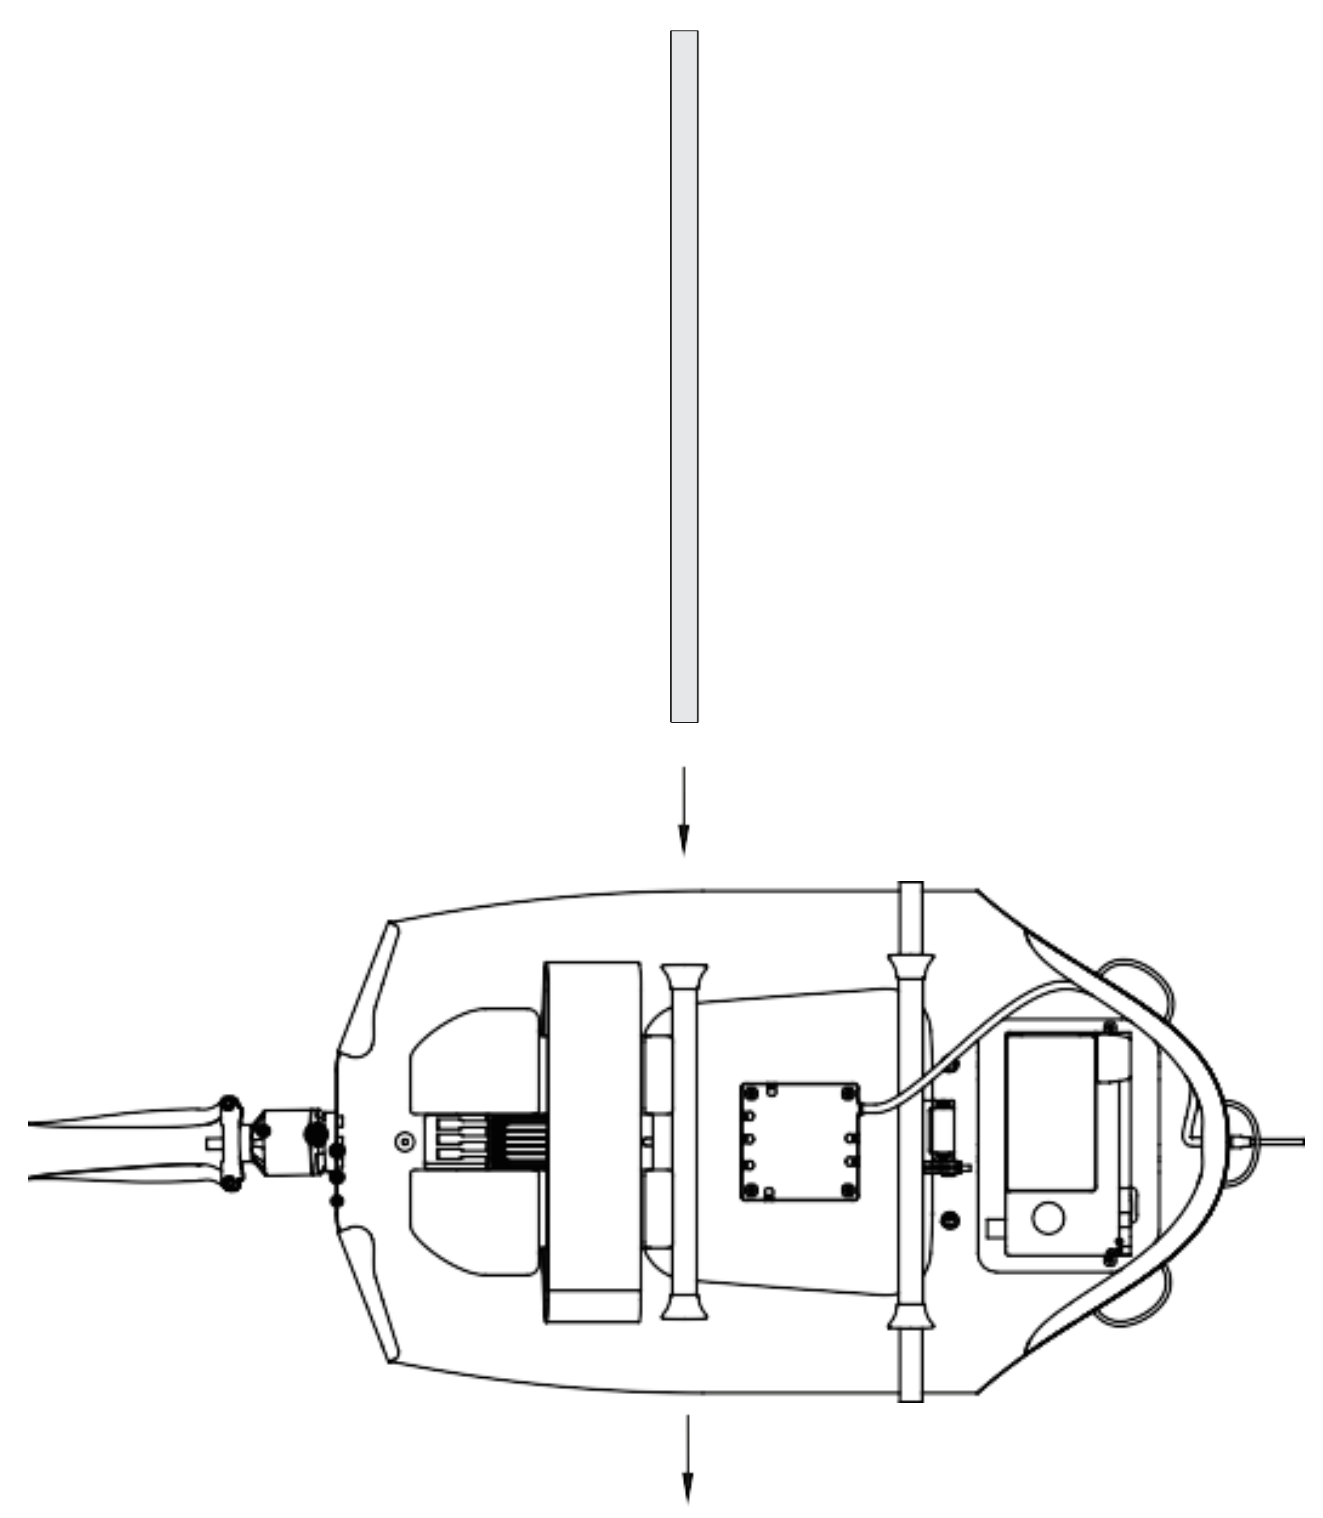
Puting of the connecting rod
Put the wings on the mounting rods and move them to the fuselage limiters.
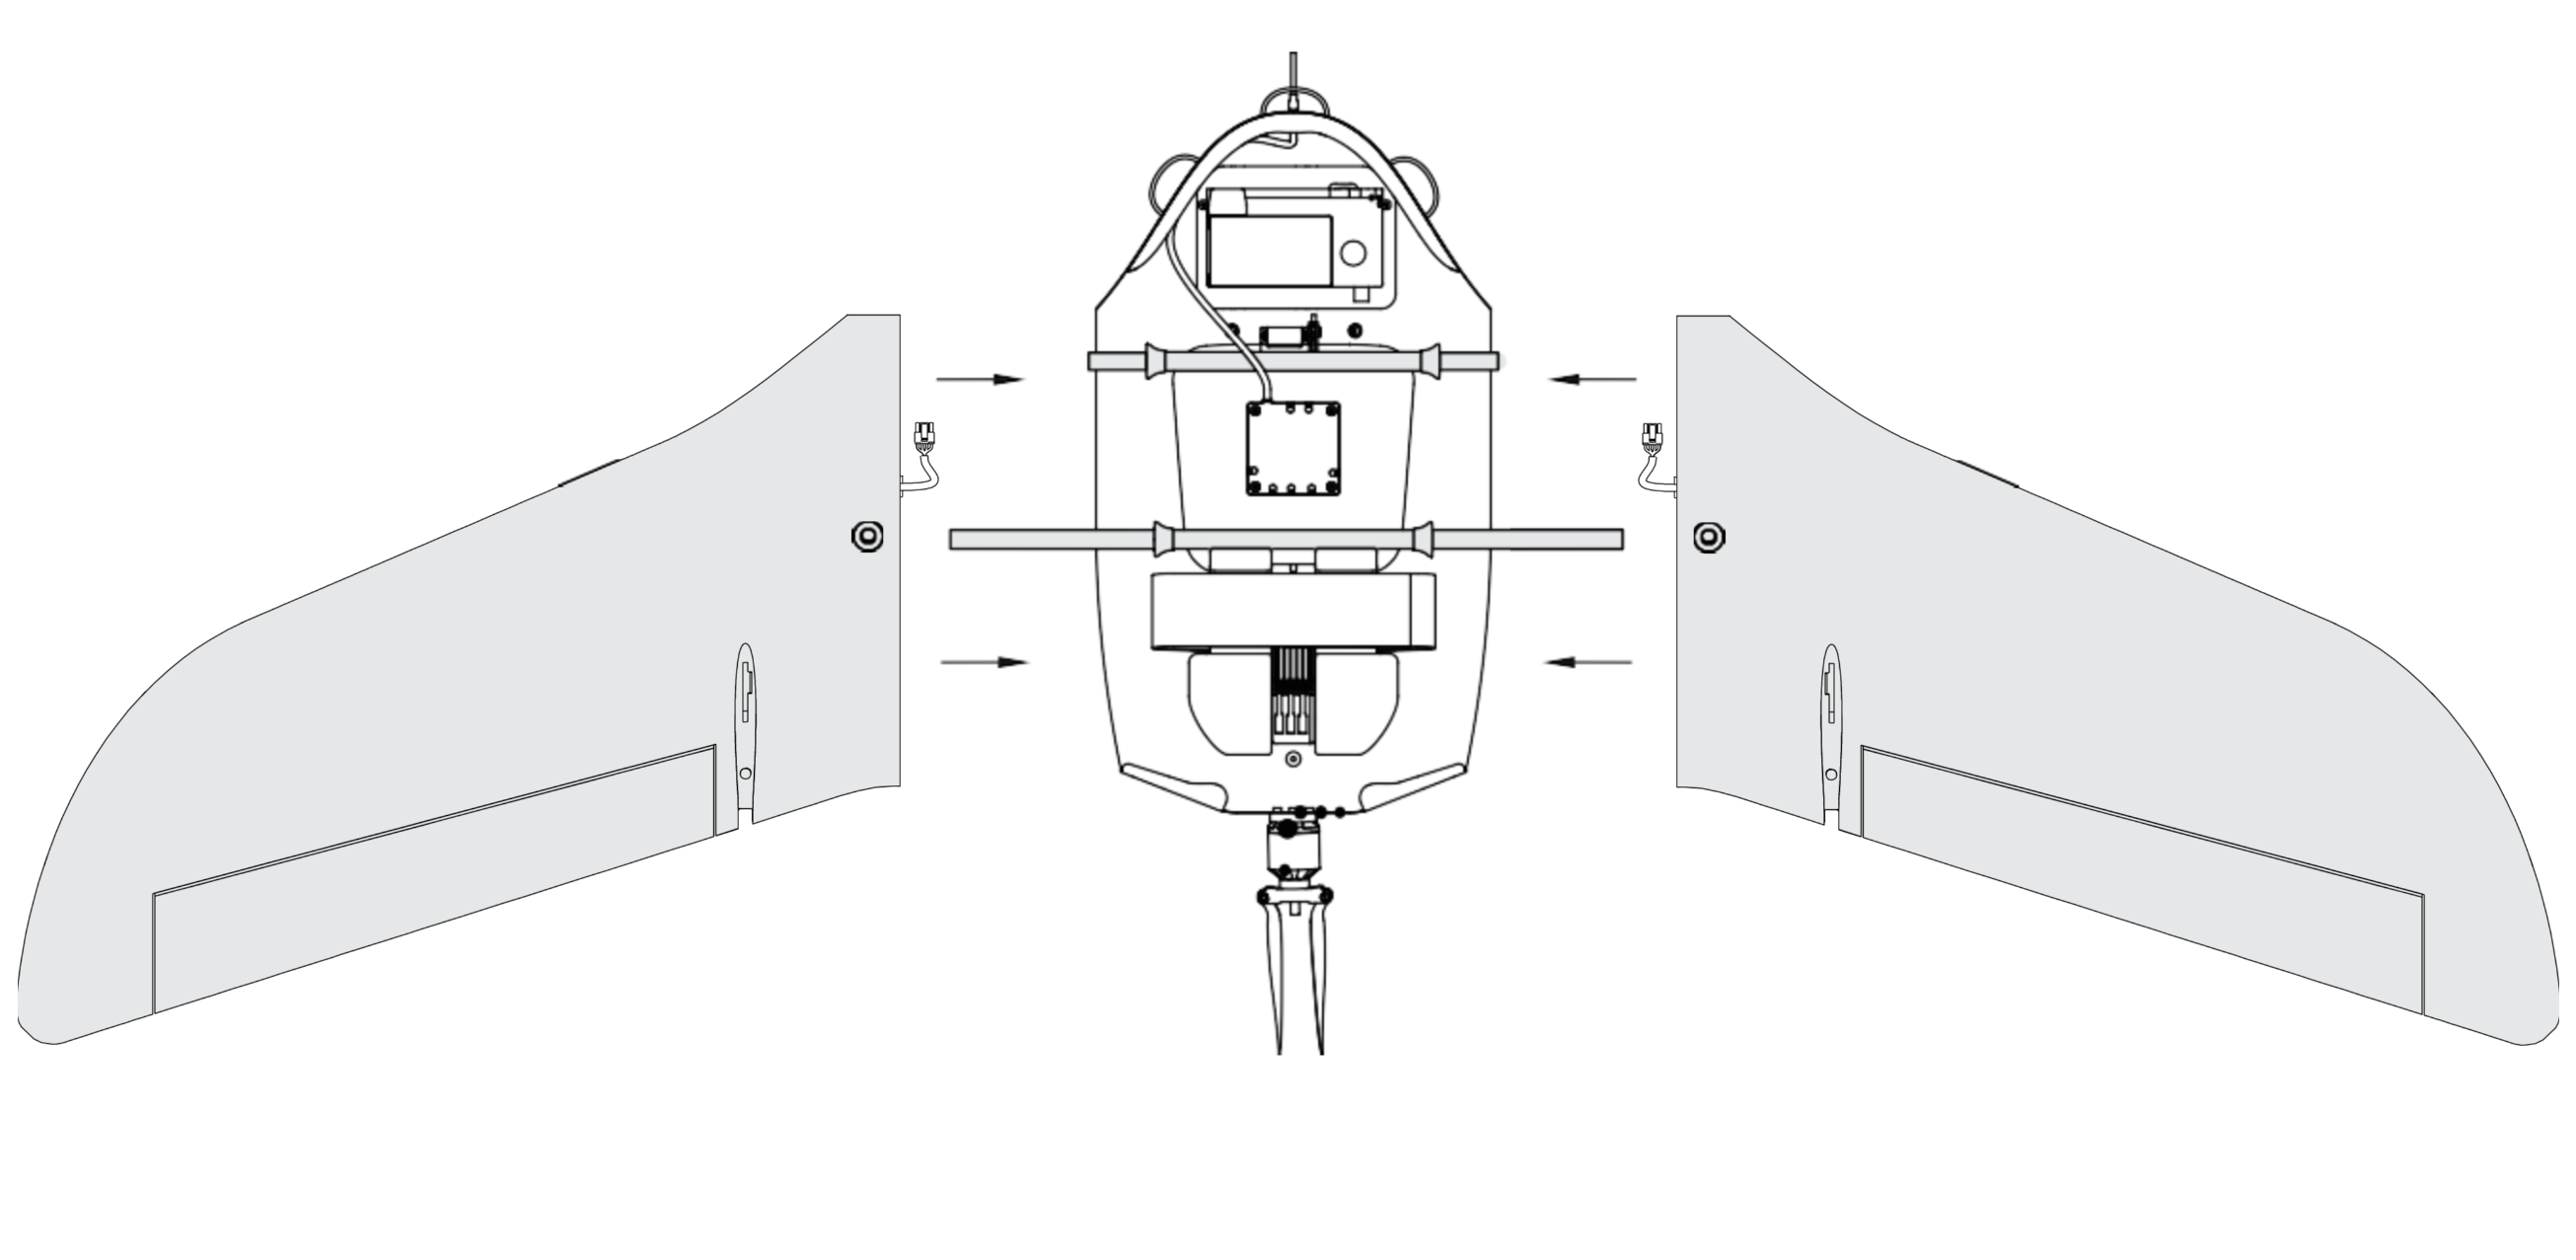
Installation of the wings
Attach the fins and fix them in place. Make sure the fins are secured by magnets.
Installation of the fins
7) Connect the cable connectors of the wings into the corresponding slots of the autopilot. Don’t forget to connect GNSS receiver plug.
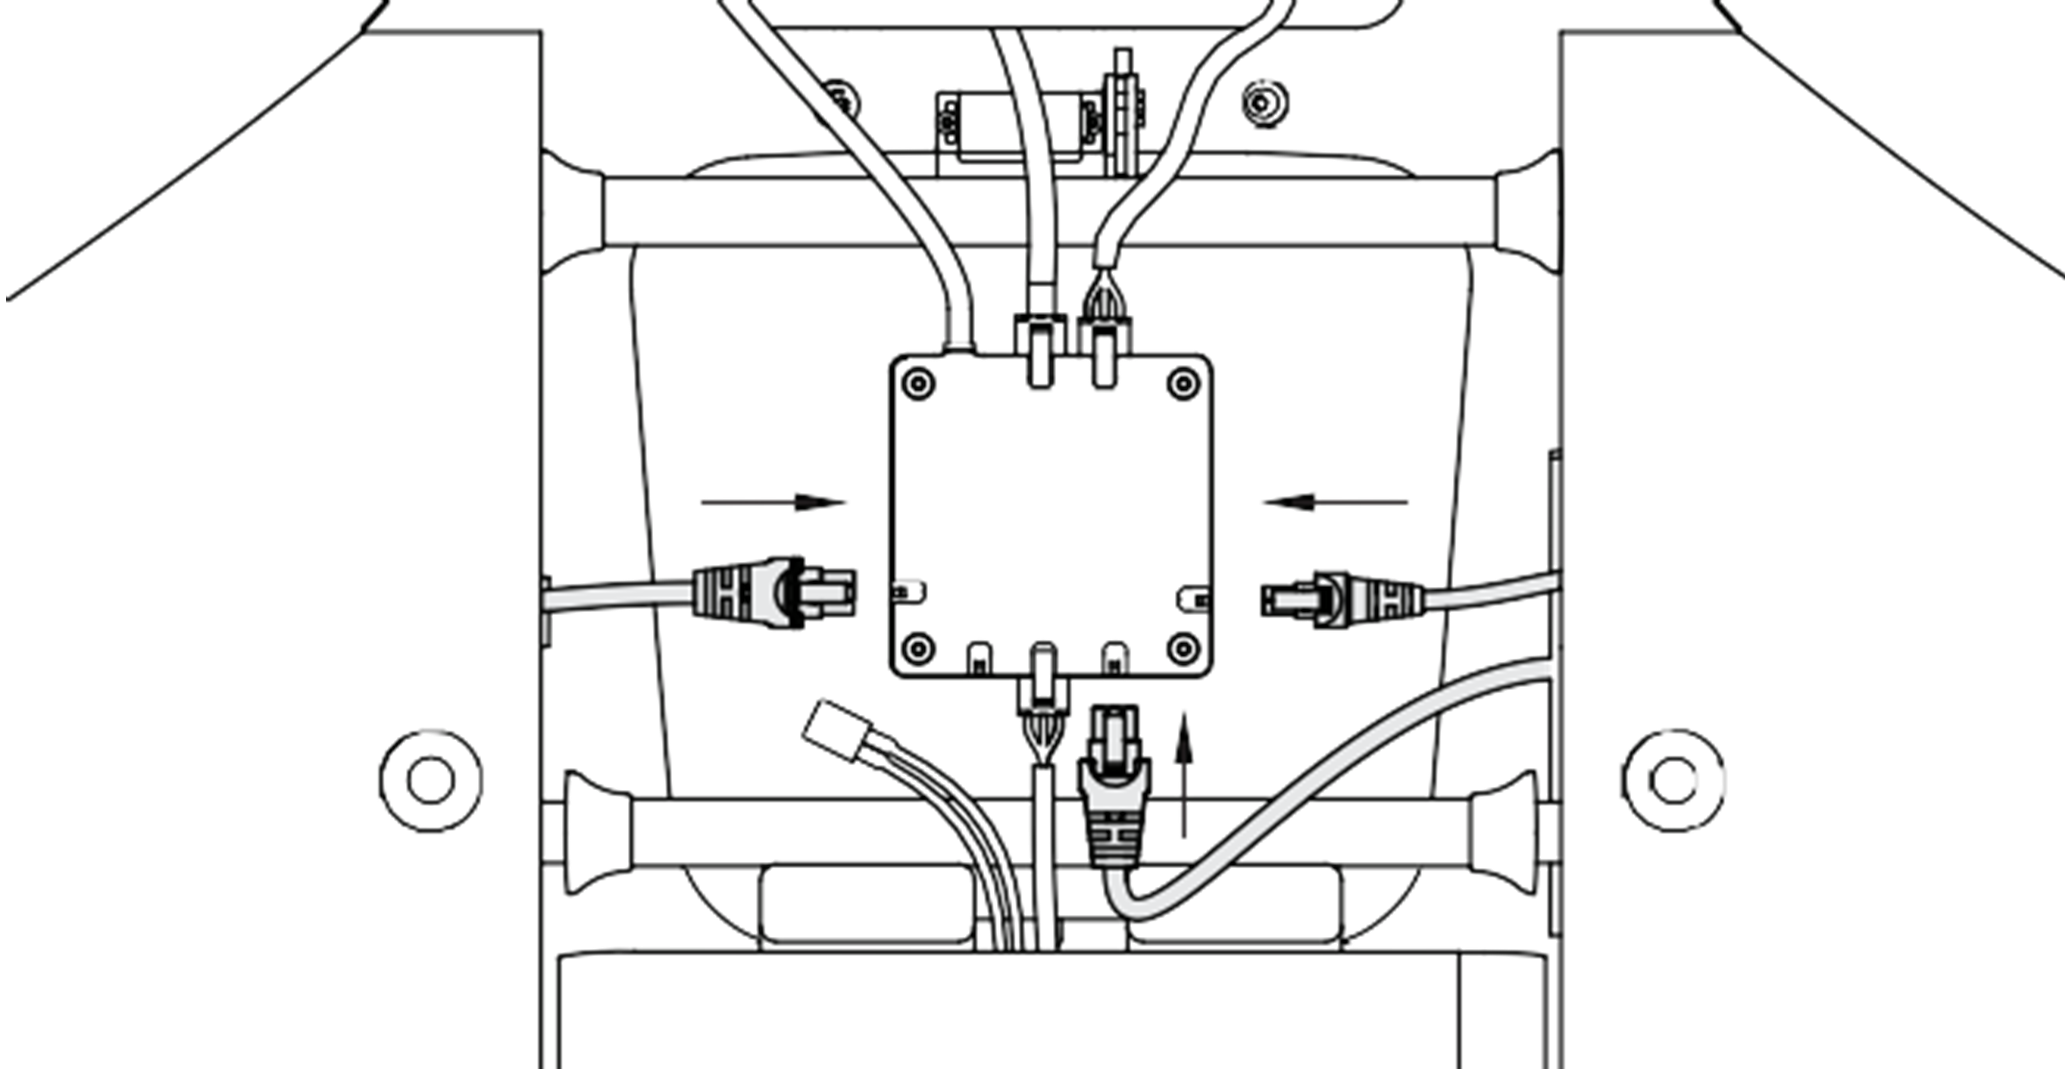
Connection of the cables
Remove memory cards from autopilot and camera. Format them and put back in slots.
Install battery and lock it with textile clasp.
Connect power connector with the battery.
Installation of the SD card and the battery. Connection the battery.
Set up the camera (see section Camera Settings). Place the camera in the cradle.
Close the top cover and clasp the rubber locks.

Closing of the fuselage’s top cover
UAV ready for pre-launch check.
Parachute system
Components of the parachute system:

1 – parachute compartment cover; 2 – parachute dome; 3 – pockets for laying rigging lines; 4 – rigging lines; 5 – locking ring; 6 – long static line; 7 – short static line with unhook ring system.
Attention
Make sure that the parachute dome, rigging lines and their attachment to the dome are not damaged before laying the parachute. The dome and rigging lines should be dry and clean. Repack the parachute if the previous packaging is more than 10 days ago, or you were carrying the complex in an airplane.
**Packing of the parachute**
Check the parachute is not damaged.
Make sure the rigging lines are not tangled.
Make sure, that rigging lines are not tangled in the process of laying the parachute.
Control the position of the rigging lines pockets. They must remain on the outside of the folded dome.
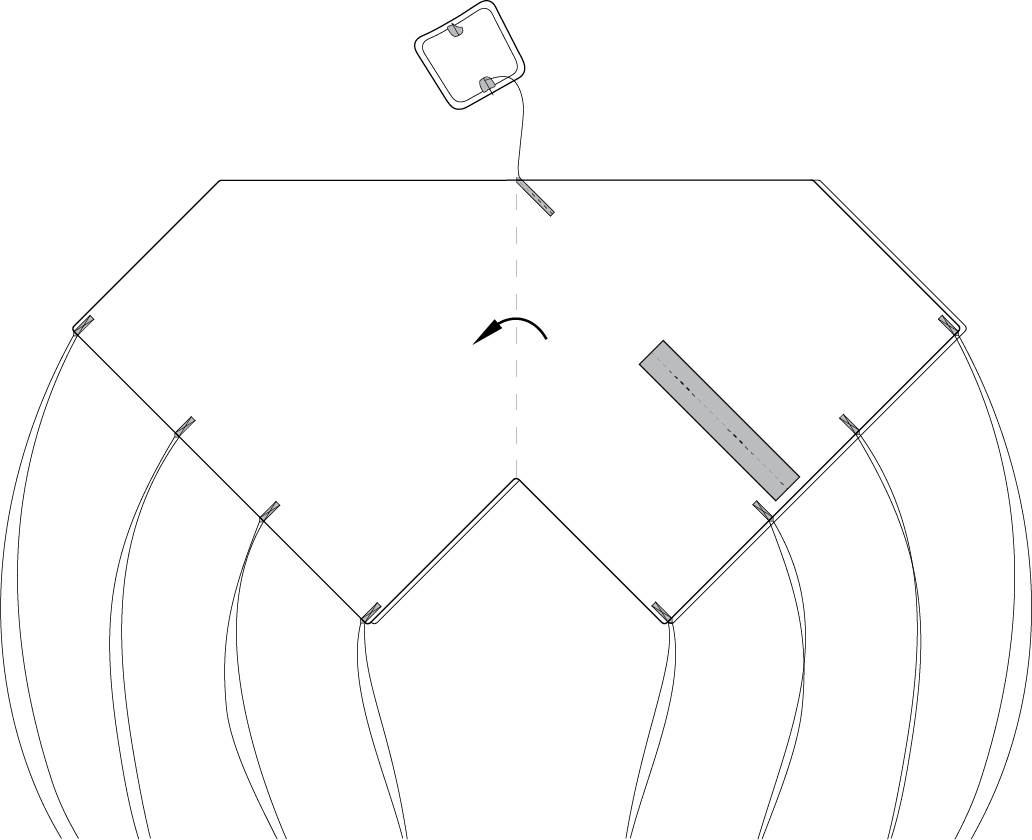
Smooth the dome and fold it in half, aligning one side with other.
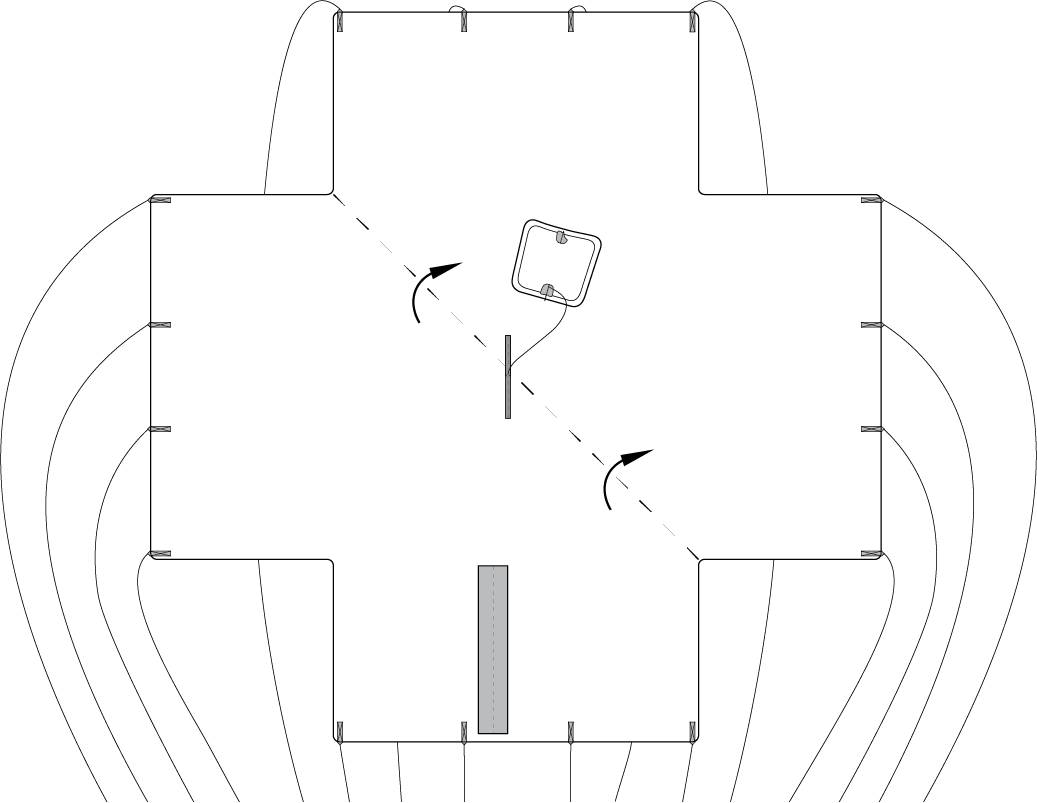
Folding the dome in half
Fold the dome in half and align the edges.
Folding the dome in half second time
As the result, the lines should be collected in 4 bundles with 4 lines in each.
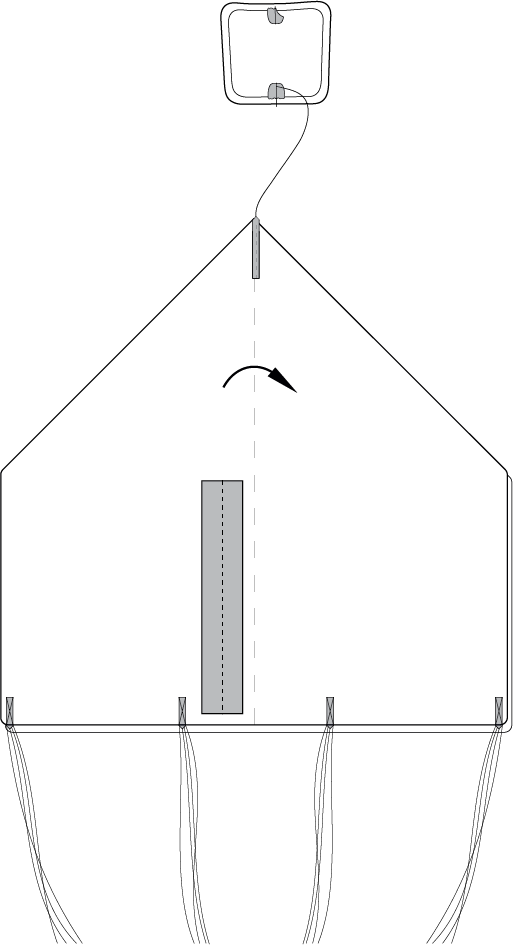
Result
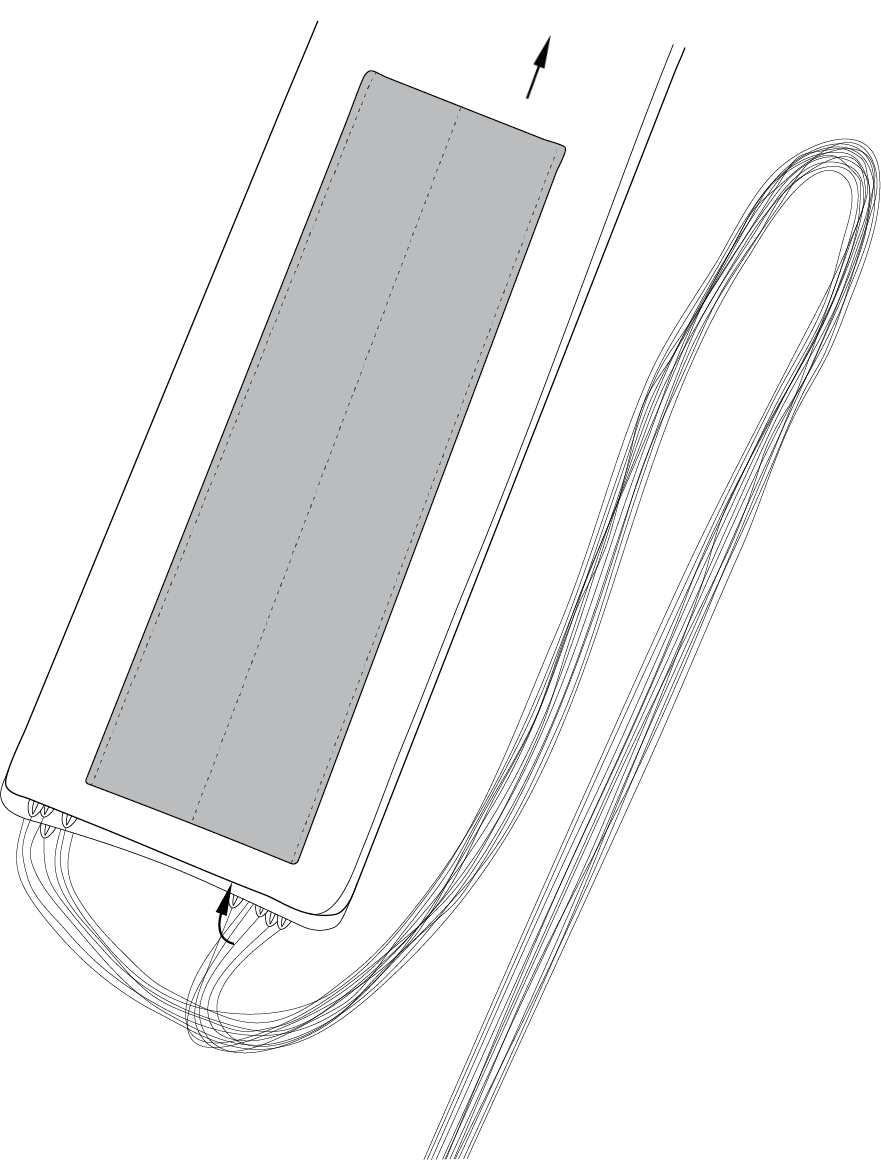
Fold the dome in half again. The pockets for laying the lines must be outside.
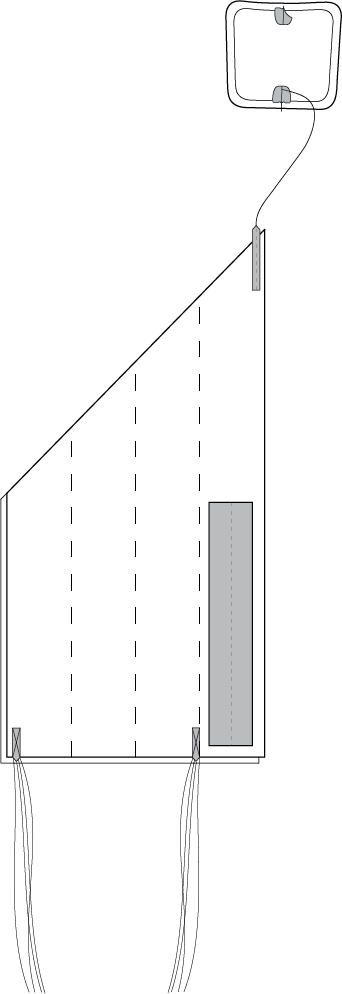
Folding the dome with pockets outside
Fold the dome as shown in the picture.
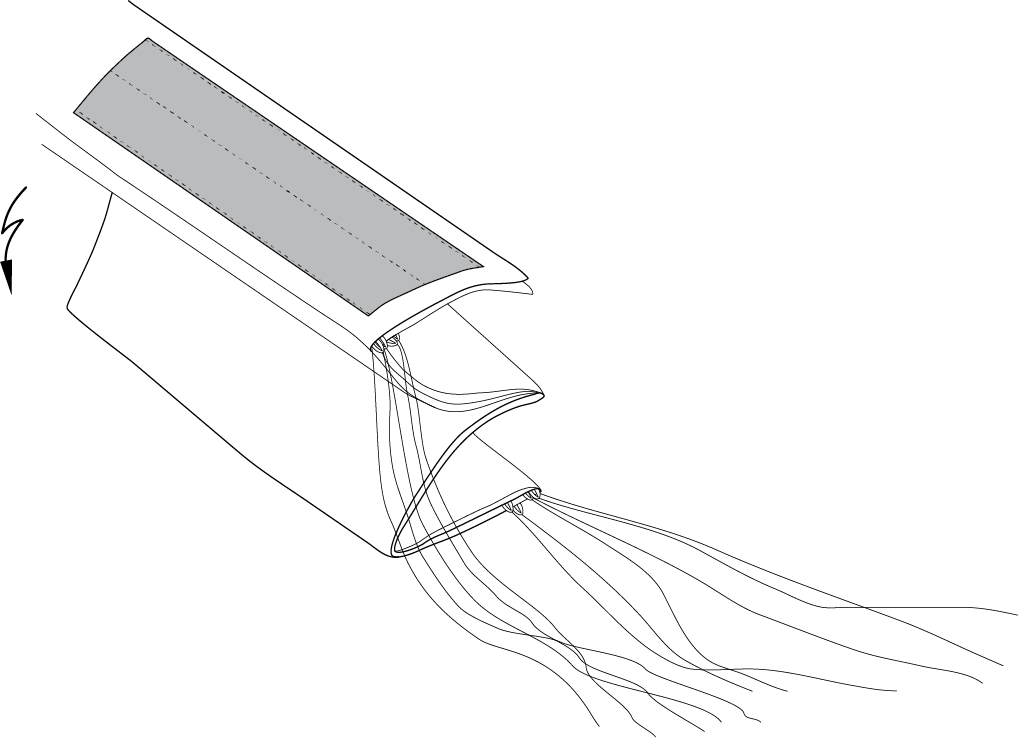
Folding the dome
Make sure that while laying the parachute, the lines haven’t get tangled. If necessary, straighten the lines out.
Put lines in the pocket, as you see in picture. To do this, measure the length of the bundle, it should exceed the depth of the pocket. Fold the lines bundle in half and stretch in the pocket, so that the bend of the bundle a few centimeters protruded from the opposite side of the pocket. If necessary, you can eliminate the slack of the lines at the edge of the dome, pulling them over the bend on the opposite side of the bundle.
Put parachute lines into the pocket
Move locking ring towards the dome. Put the straps into empty dome pocket.
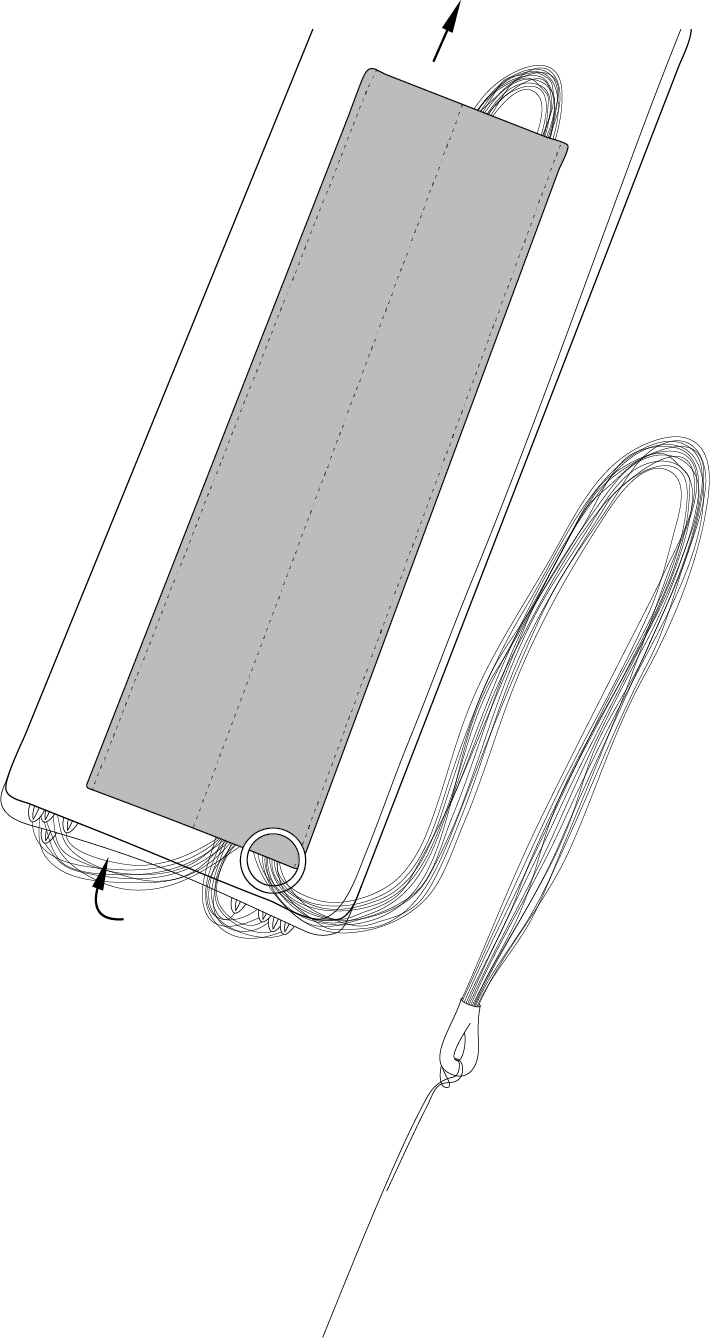
Pulling the lines through the pocket
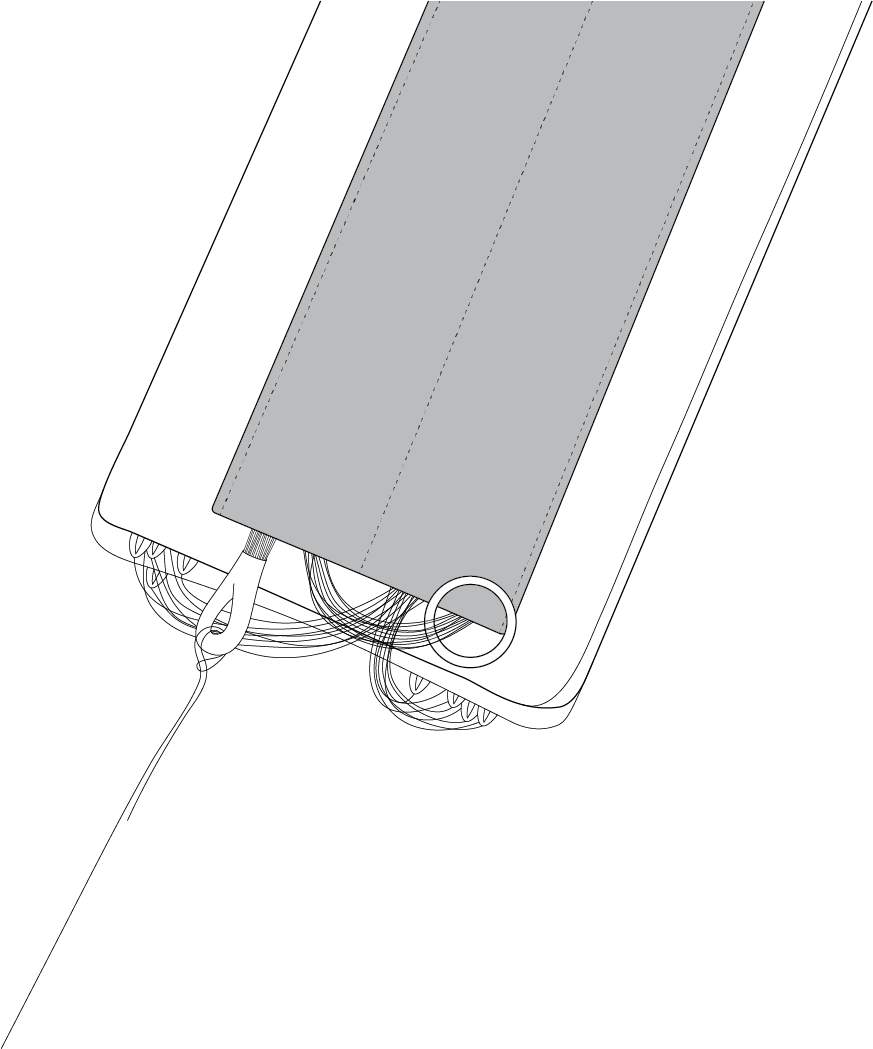
Result
After laying the remaining lines into the pocket of the dome, locking ring is positioned between the loops of the lines.
Fold the dome as shown in the picture.

Folding the dome
Installing the parachute in the UAV
Turn the UAV upside down so that the parachute compartment is up.
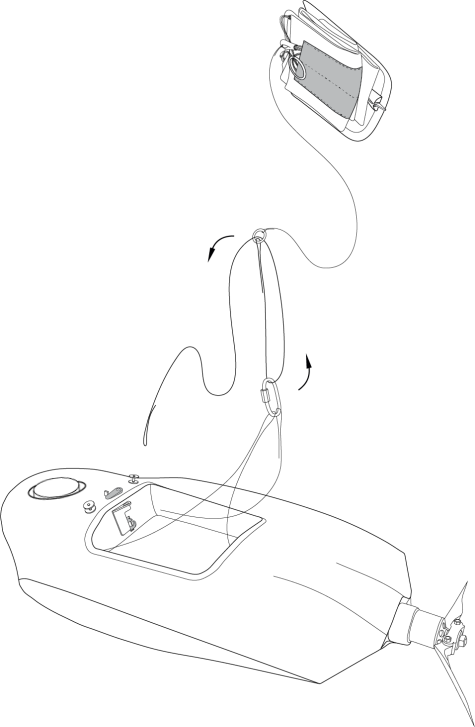
Pick up a carabiner and straighten the lines.
Put short static line end through the carabiner (as shown in the picture).
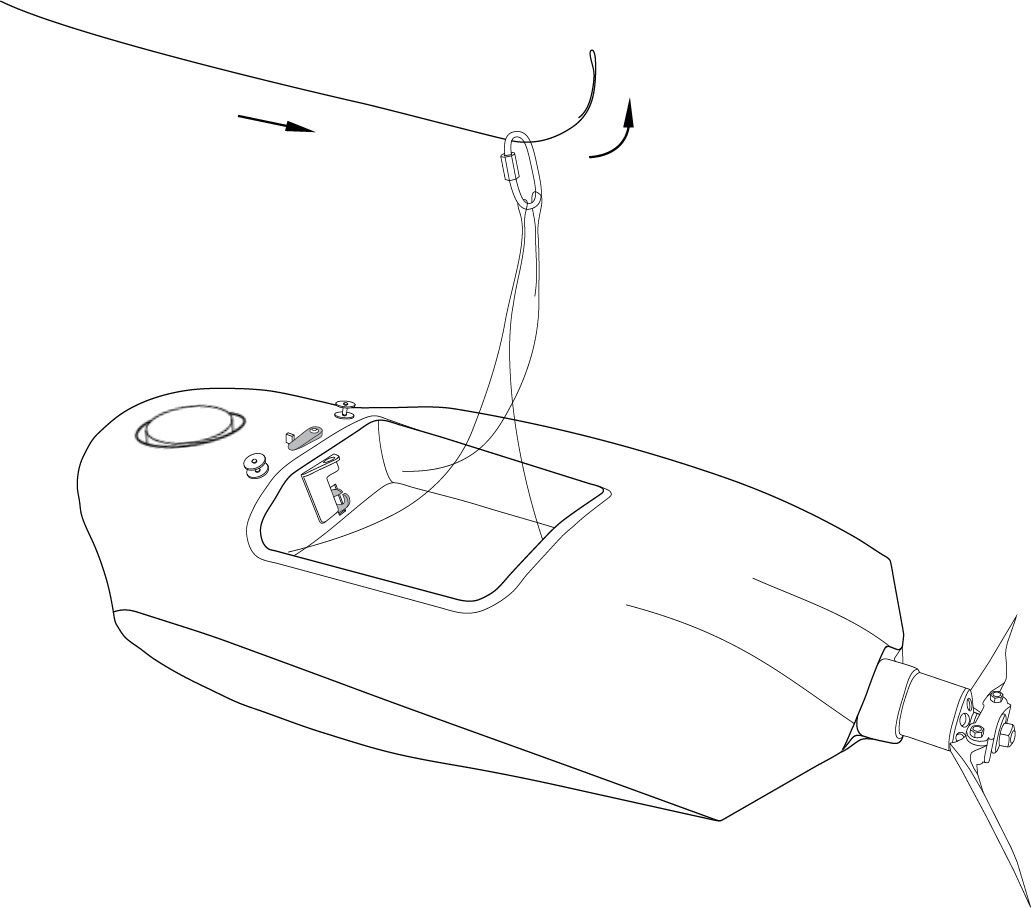
The short static line end in a carabiner
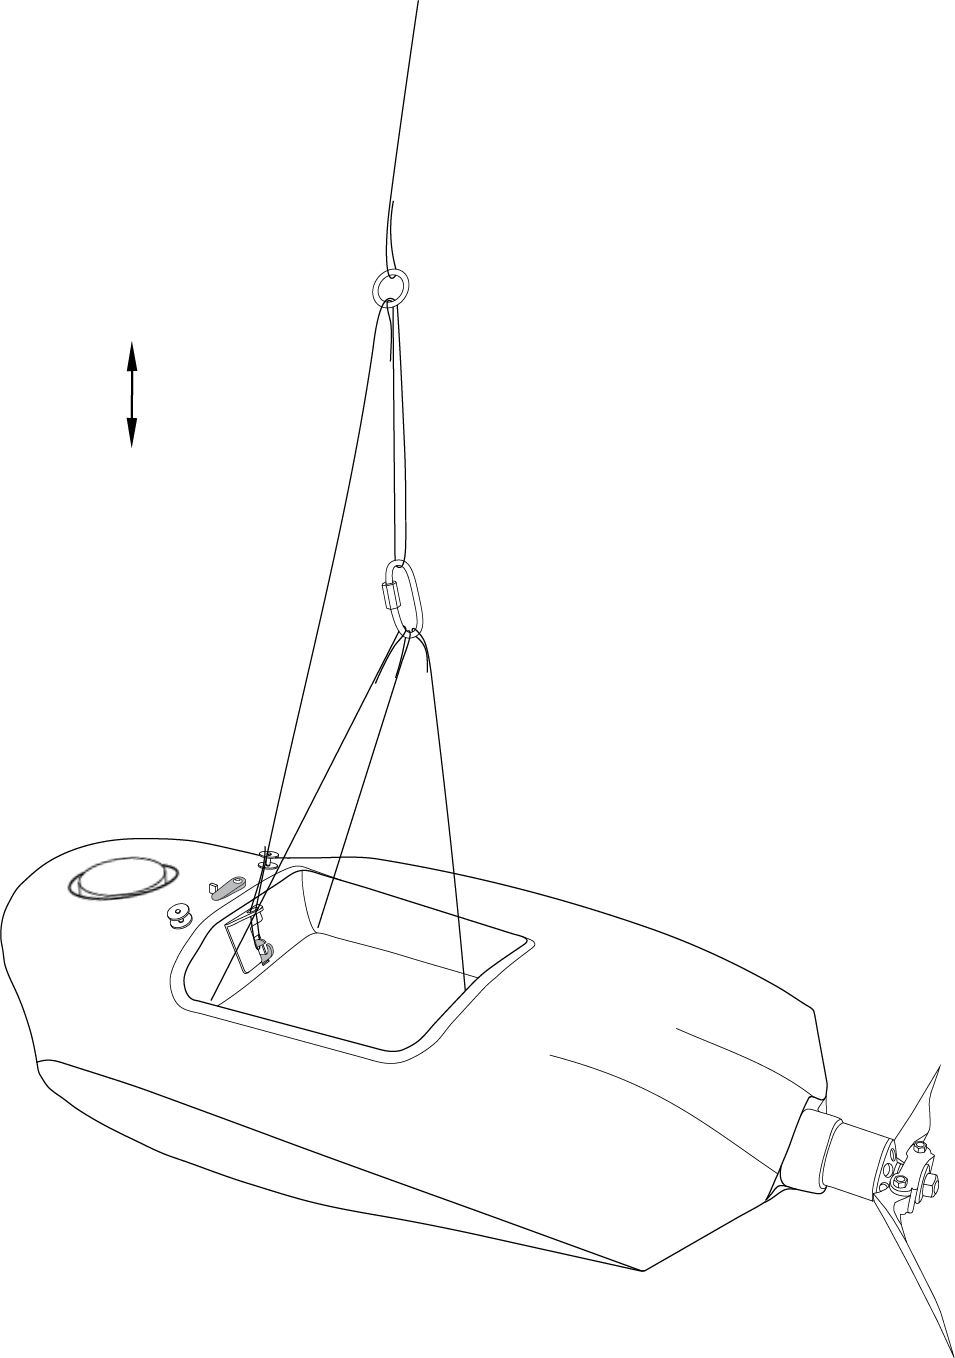
Put short static line end through release system ring (as shown in the picture).
Put the end of the short fall into release system ring
Put short lanyard end in release system ring and lock the rope between two halfs of the lock.

Placing loop in the lock
Note
Make sure the release system is securely locked. To do that, hold to the parachute dome and pull it up sharply several times.
Carefully fold the parachute system ropes and lines on the bottom of compartment.
folding the ropes of parachute system
Place the parachute on top so that the locking system ring was on the bottom of the compartment.
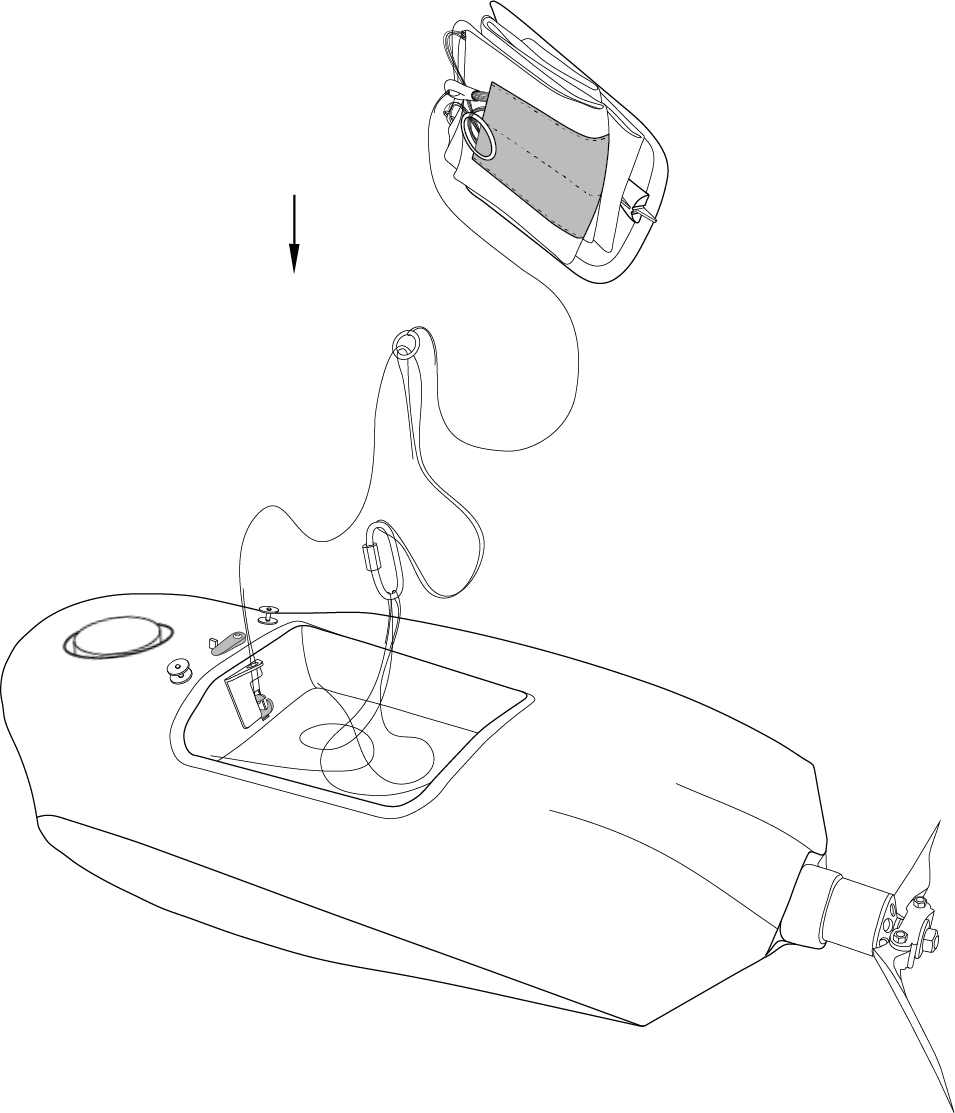
Parachute laying
Put the rear part of parachute compartment cover in the slot and push it in its place. Press the cover down and turn the locking pin to lock it with servo horn.
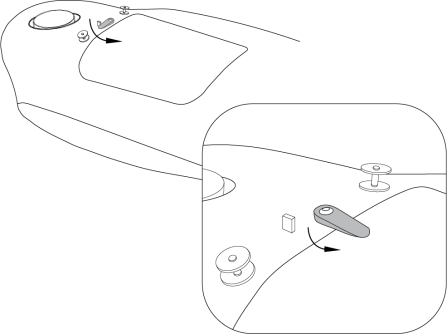
Locking the cover of the parachute compartment
Attention
Do not turn the servo horn if power is on!