Launcher

Assembly
Take out parts of the launcher from the transport bag.
Unfold the front supports of the launcher. Make sure that they are securely locked. To fold the supports, pull the locking nuts down.
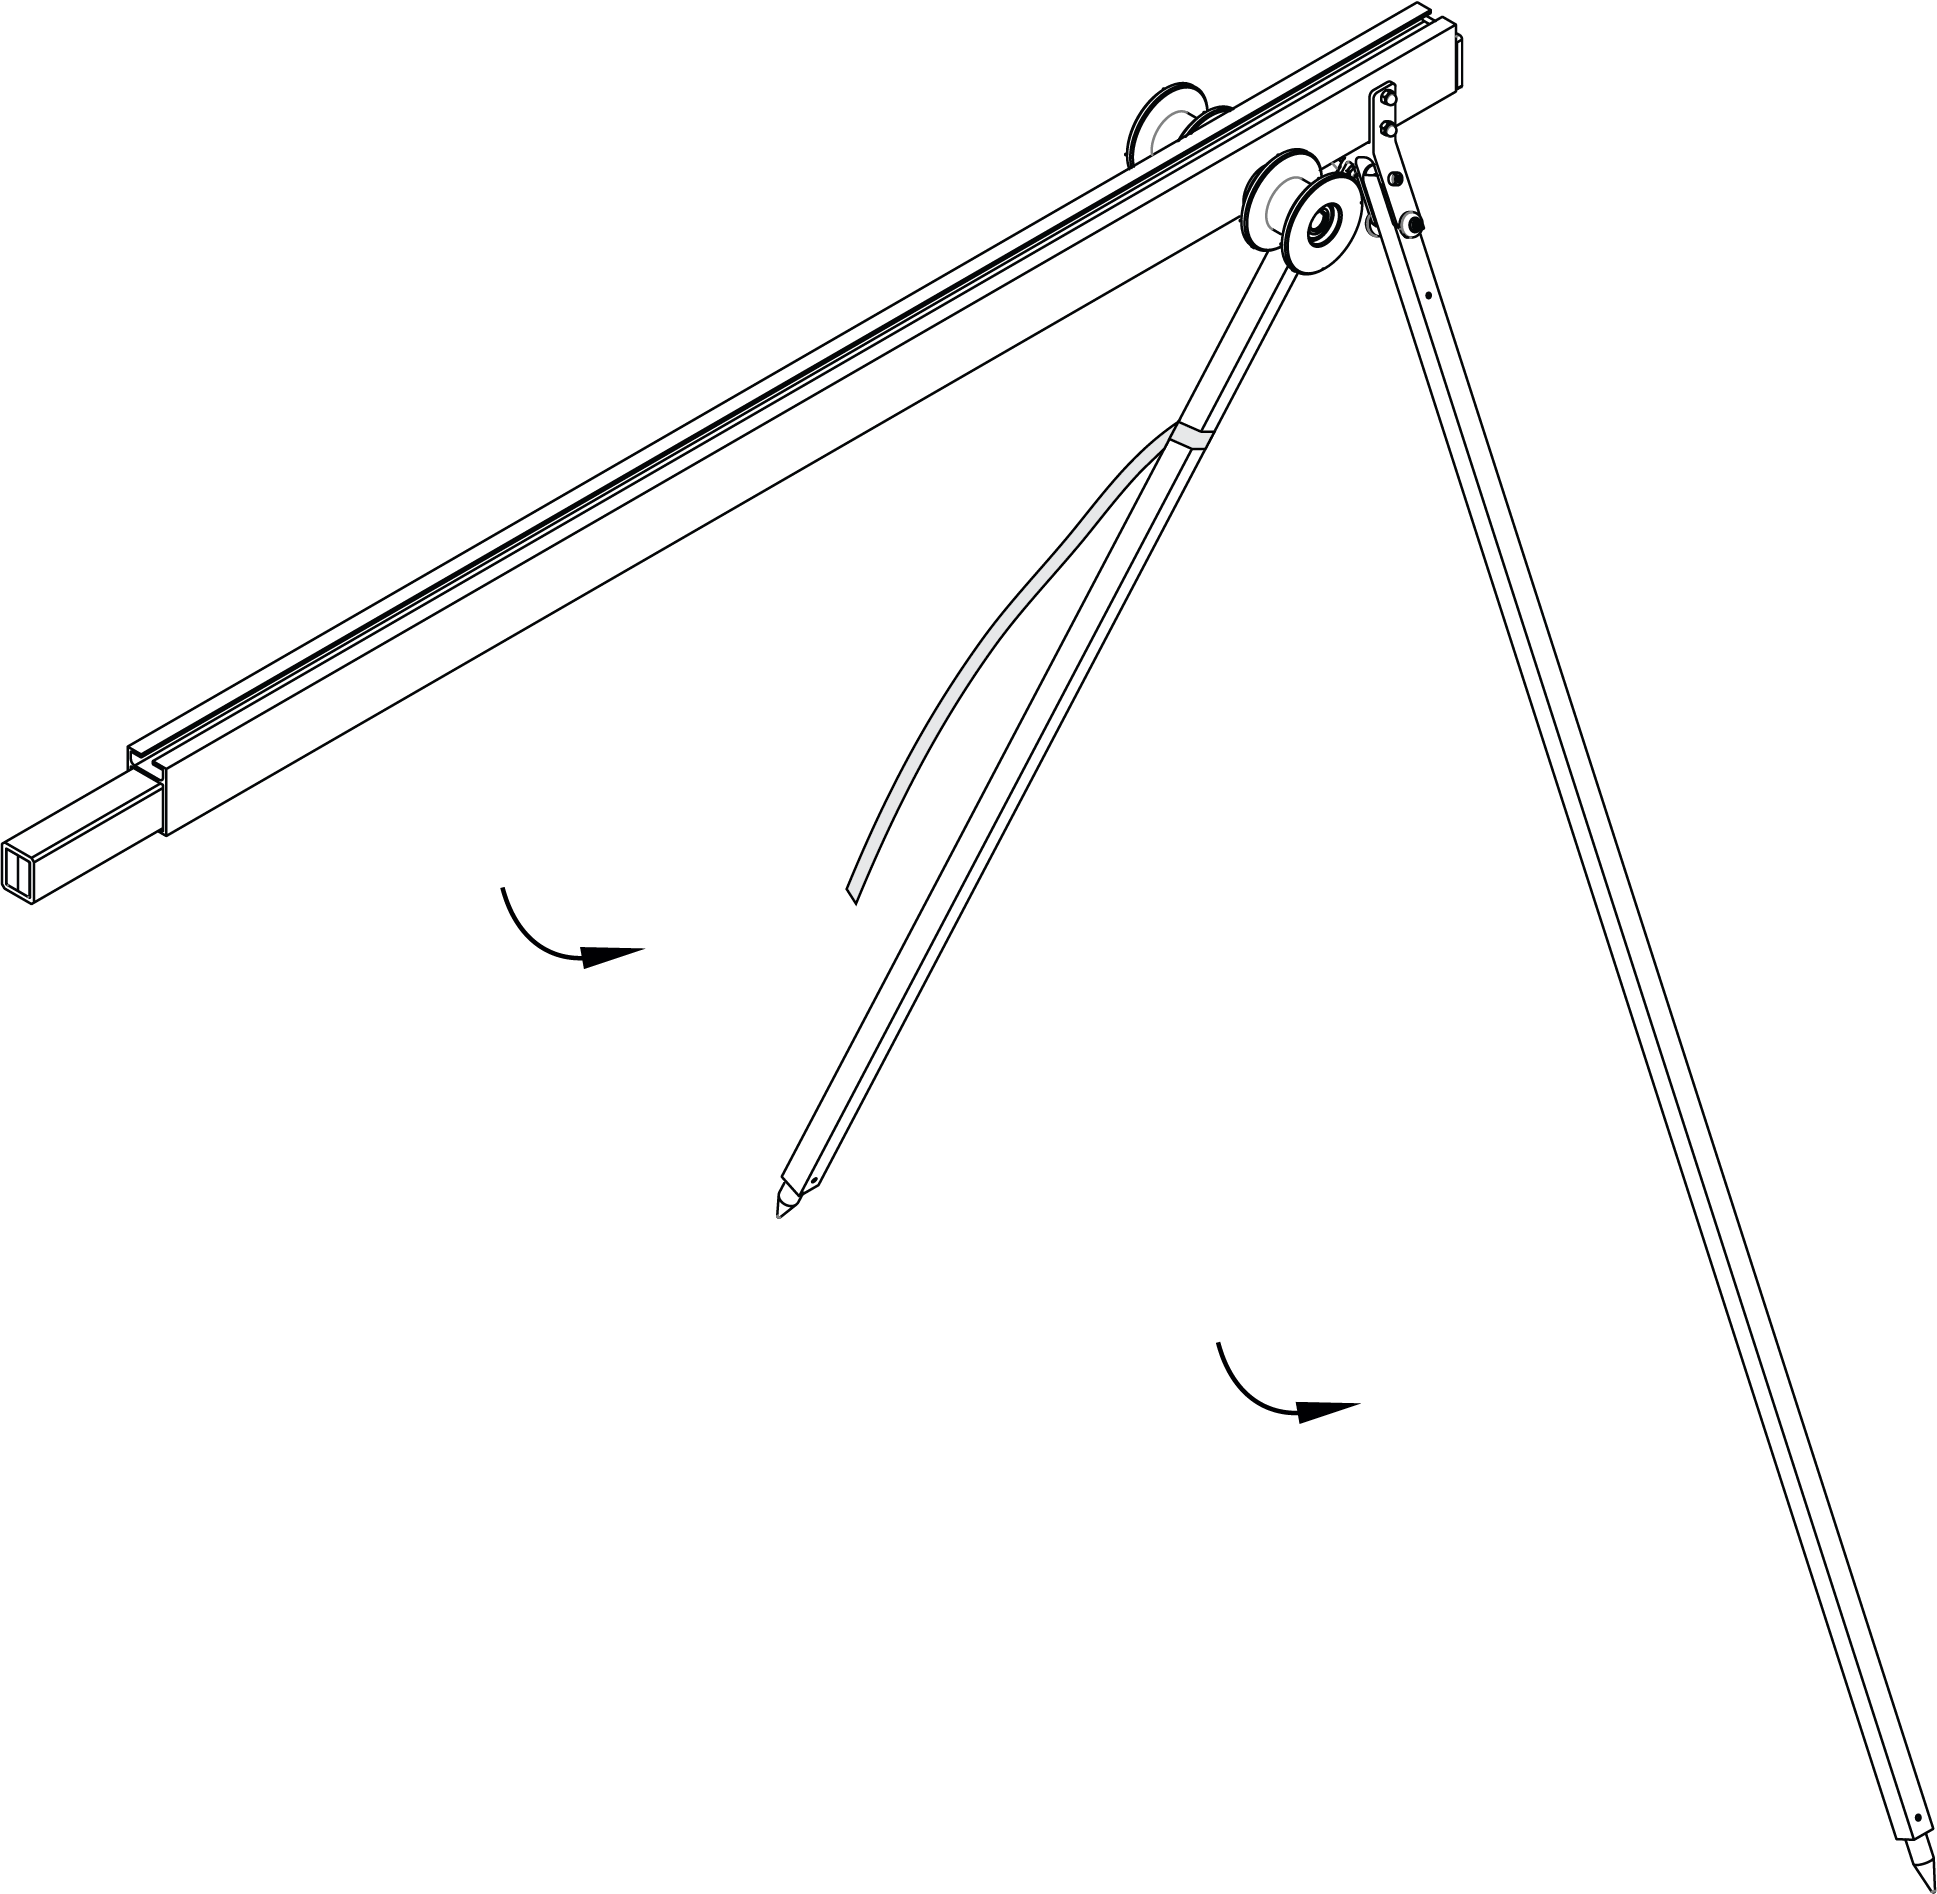
Installation of the supports
Attach the launcher’s middle part.
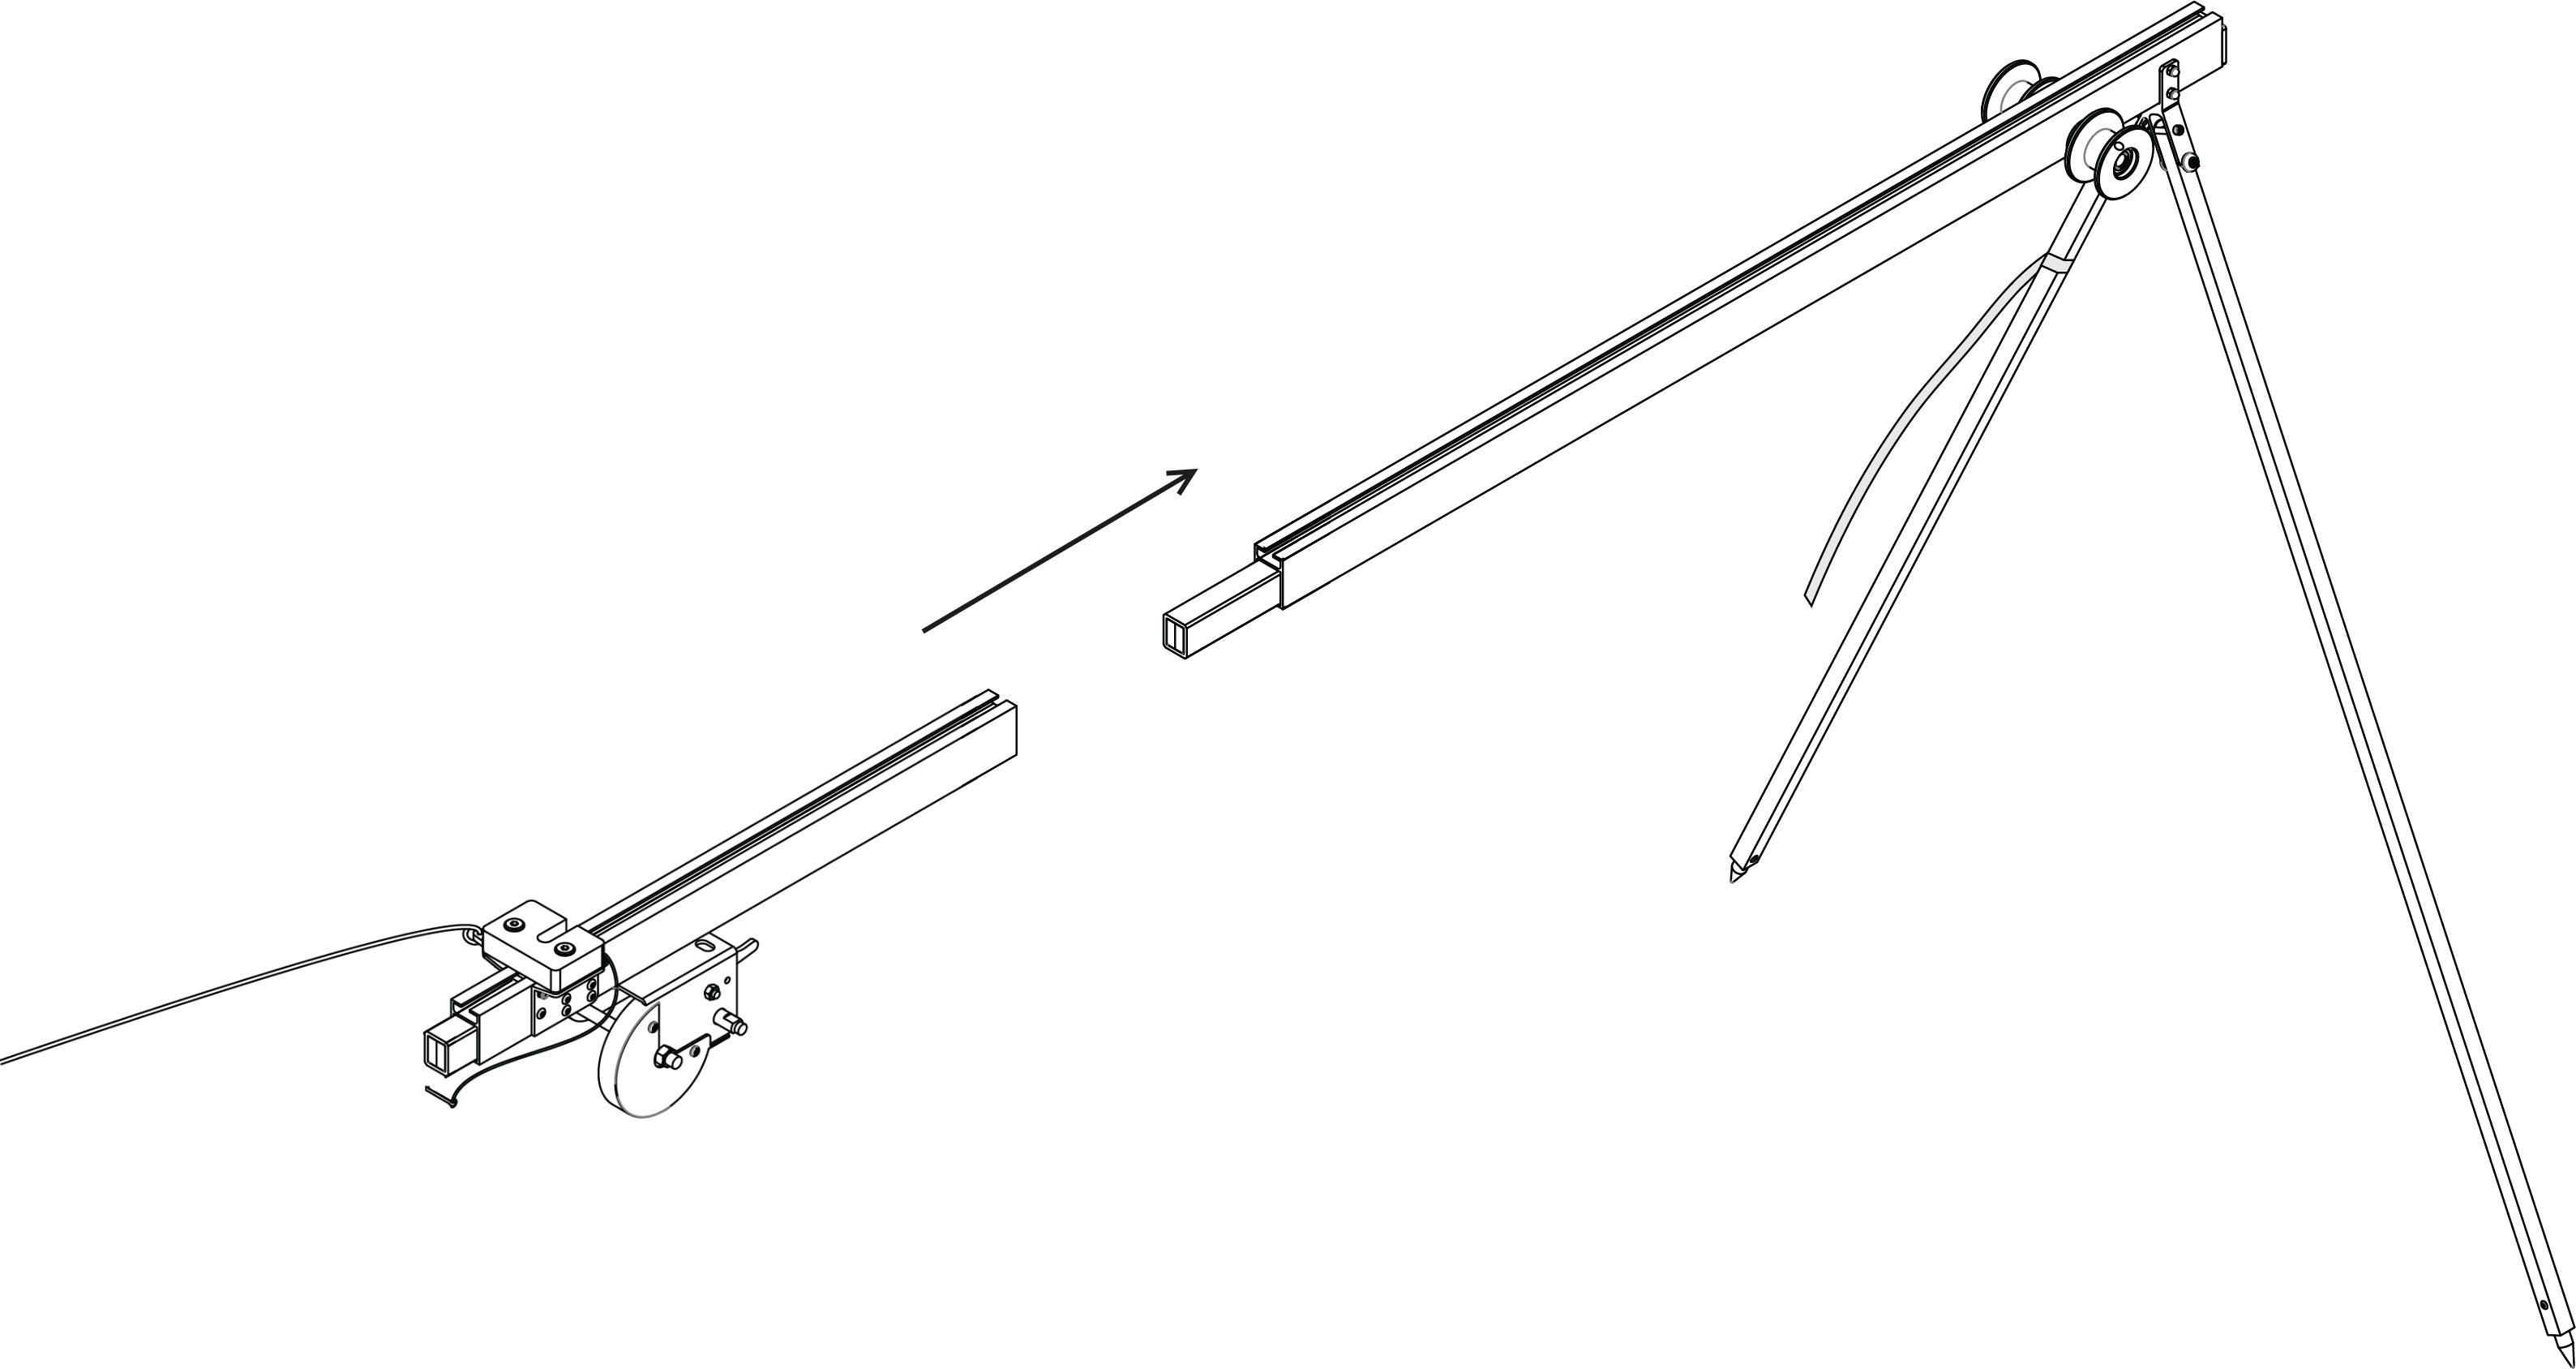
Attaching of the launcher’s middle part
Attach the launcher’s rear part.
Attaching of the launcher’s rear part
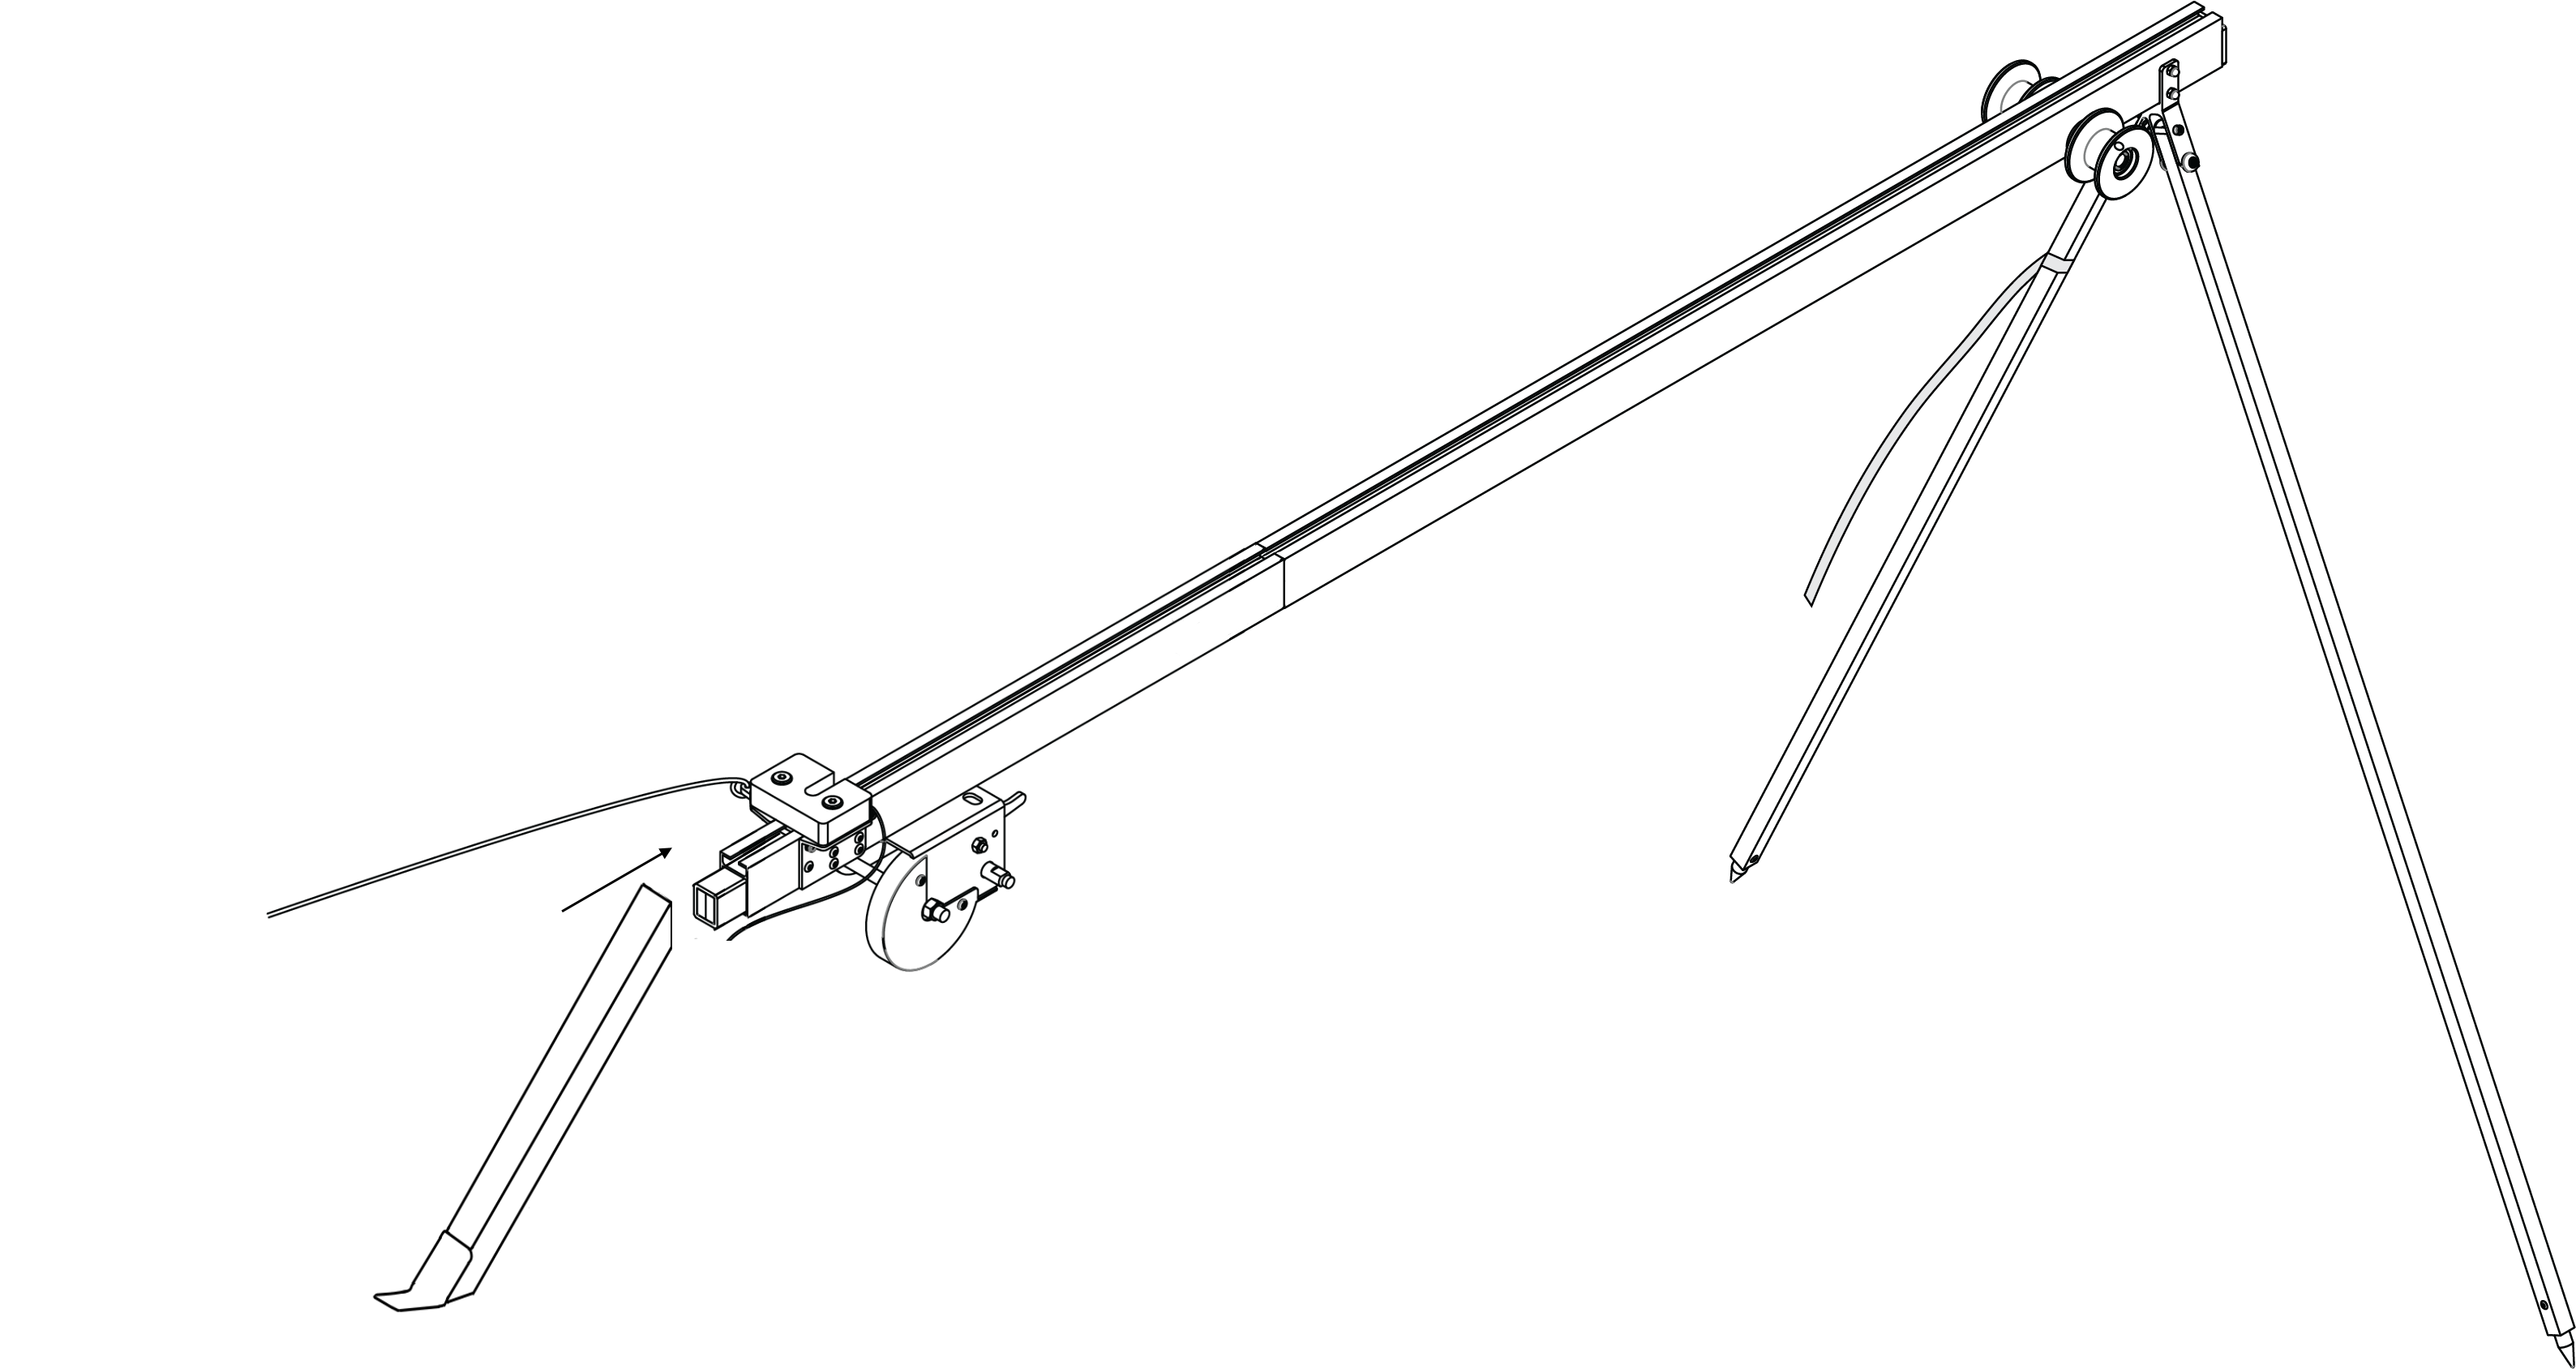
Insert the locking pin into the hole, connecting rear and middle parts of the launcher.
Place the launcher on a flat surface. The UAV must be launched against the wind. Make sure that the launcher is stable on the ground and that its guide has no roll. If it needs, bury one of the supports to align the launcher.
Attention
The launch of the UAV is allowed only against the wind. It is strictly forbidden to launch the UAV in the direction of the wind as this can lead to UAV damage, as it will not be able to gain altitude.
Install and hammer the stop peg into the bracket at the rear part of the launcher. This prevents launcher displacement at UAV start.
Attention
The stop peg must be hammered to avoid the launcher jumping at the start of the UAV. Make sure the rear part of the launcher does not get deformed when you hammer on the peg.
Install the carriage onto the guide of the launcher, so that it could slide along launcher rails.
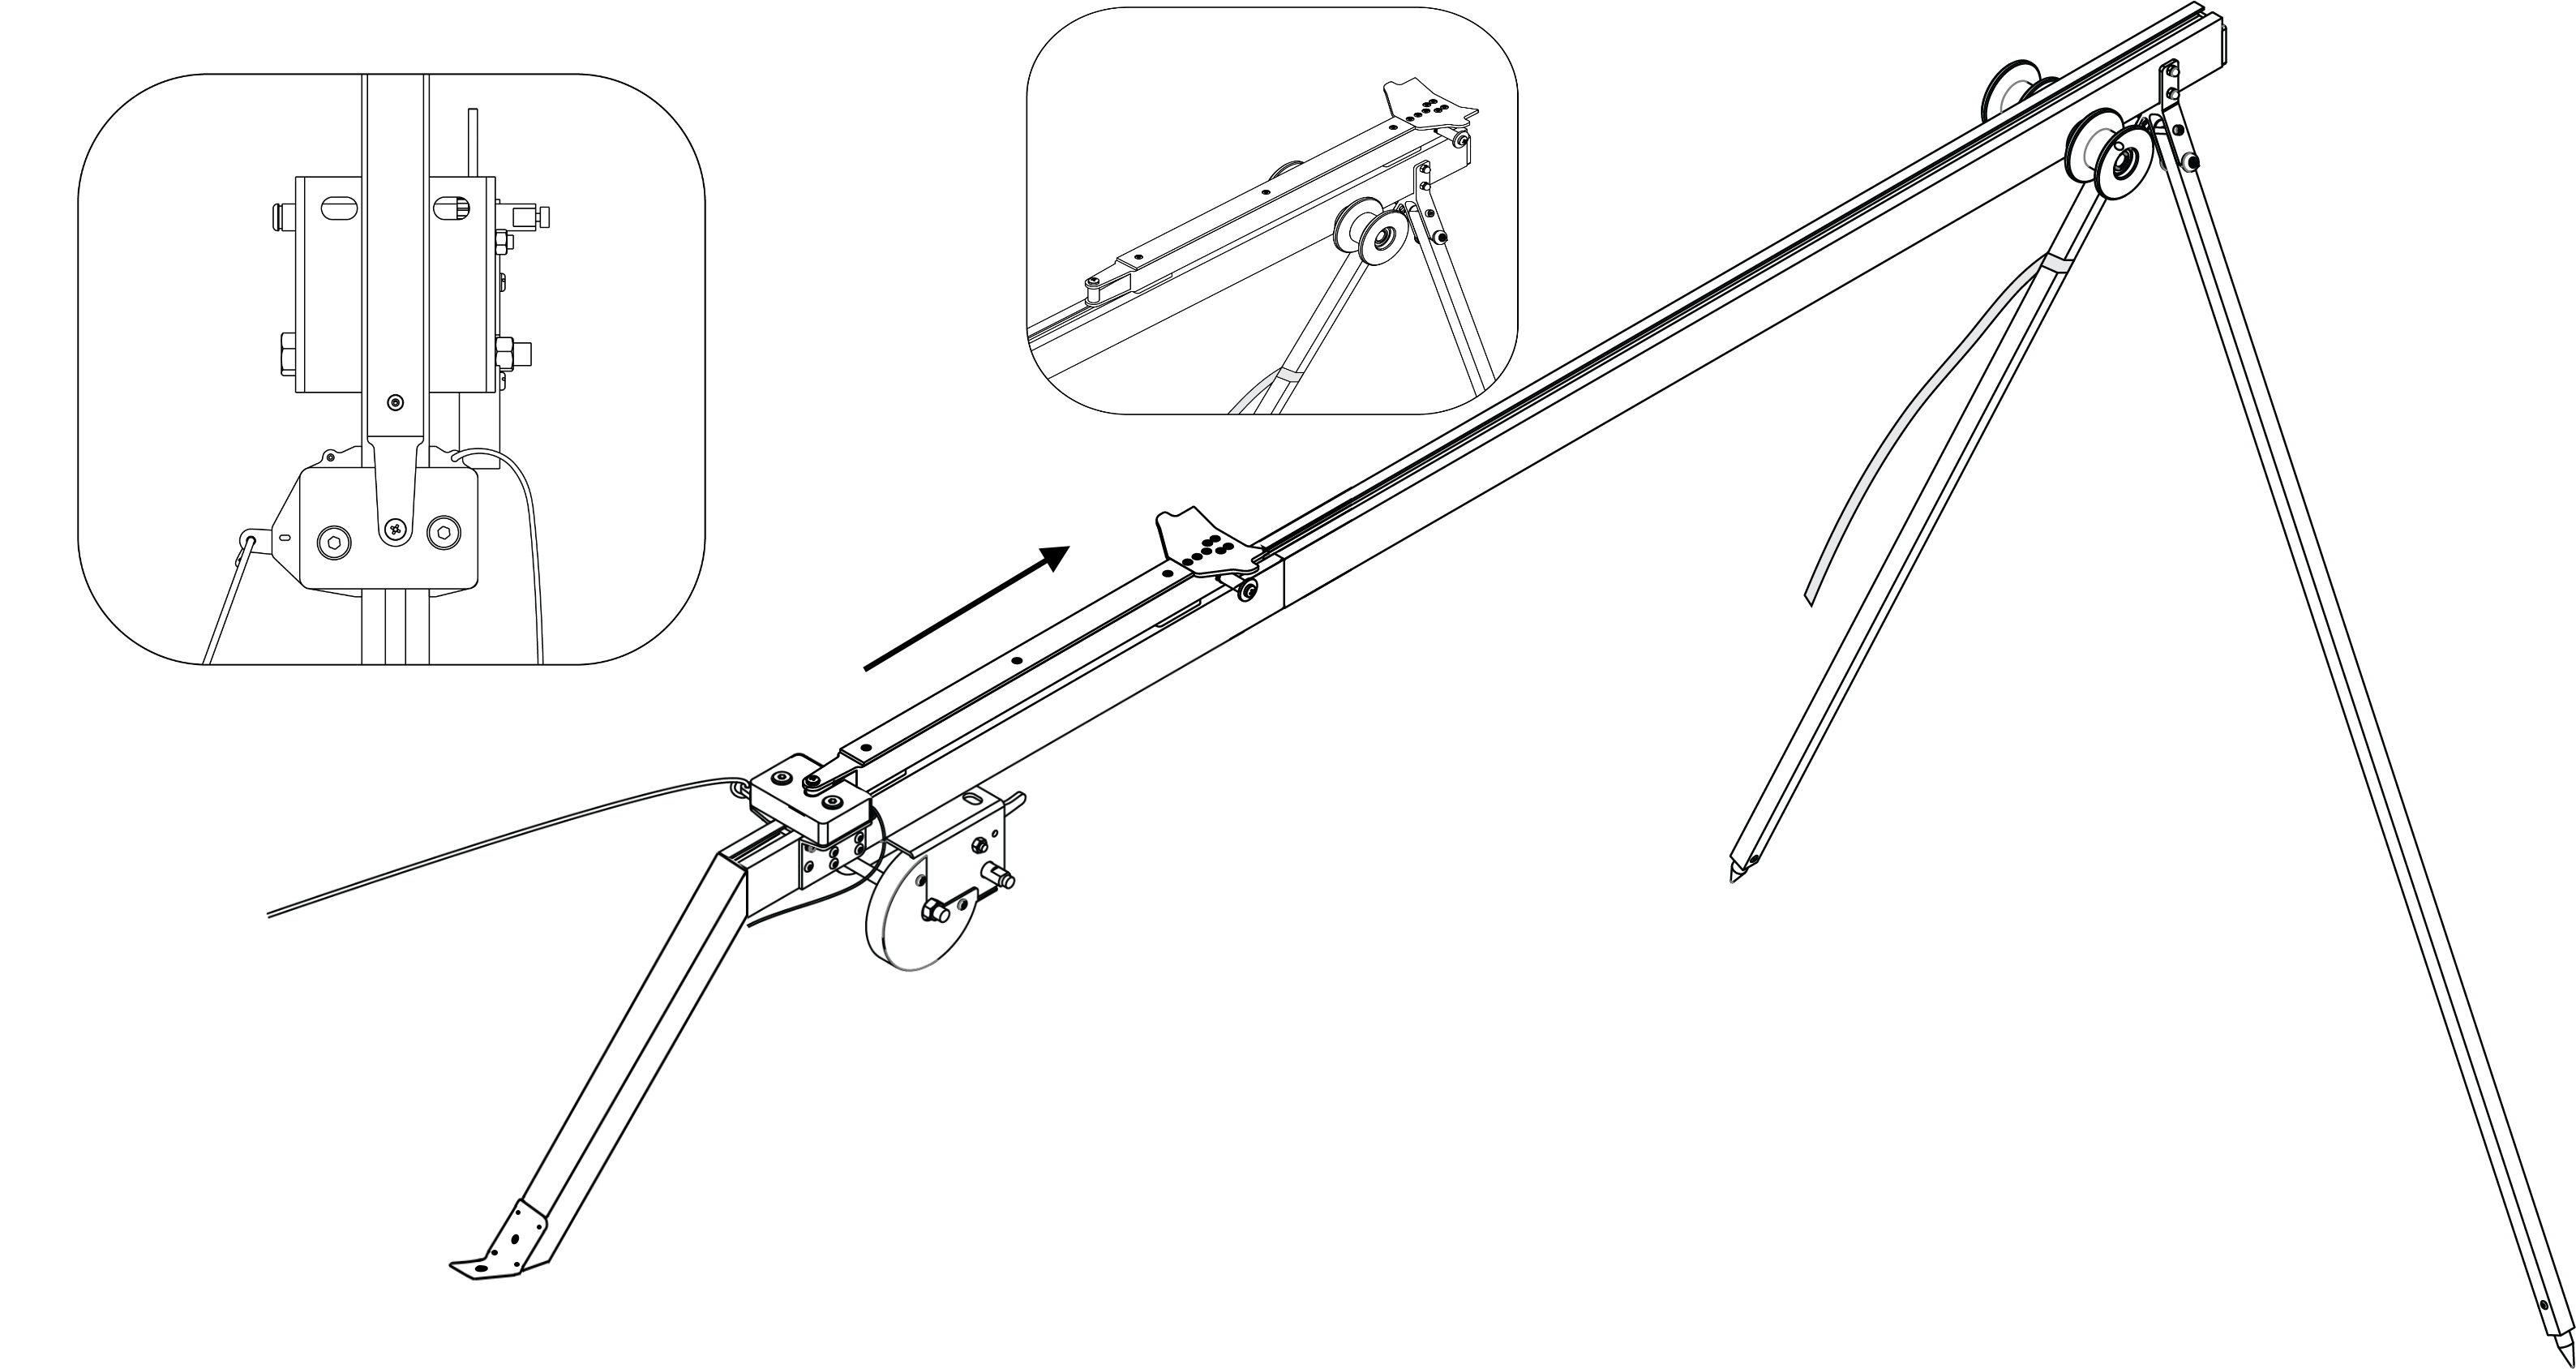
Installation of the carriage
Attention
Before every launch, make sure that the carriage slides on the rails without clinging.
Move the carriage down until it locks in the lock.
Insert the safety pin into the launch mechanism.
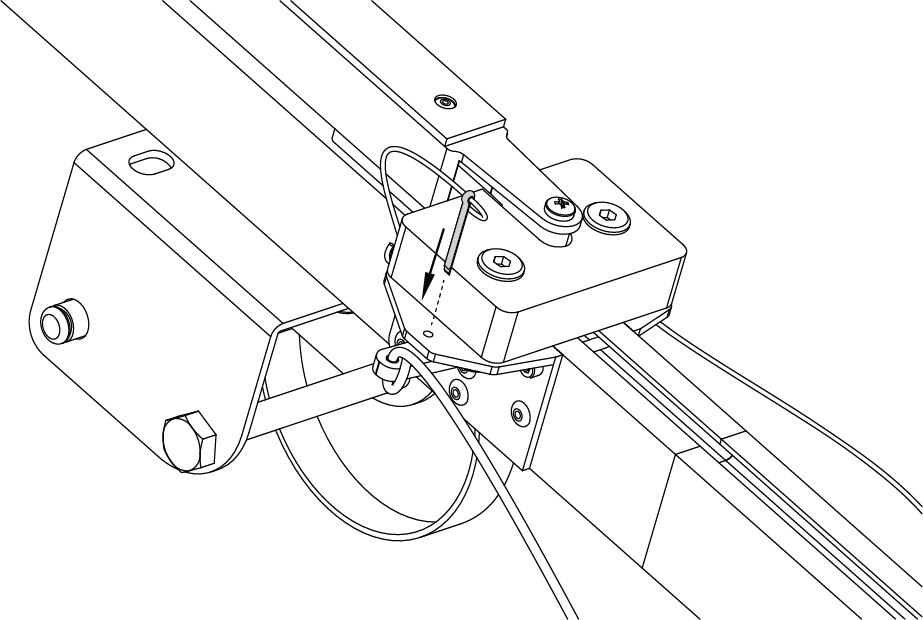
Inserting the safety pin
Attention
Otherwise, the lock may accidentally trigger!
Release the winch stopper and unwind the tension cable.
Take the rubber cords and straighten them. Make sure that the cords are not overlapped.
Use the rope to make a loop and hook it to the carriage.
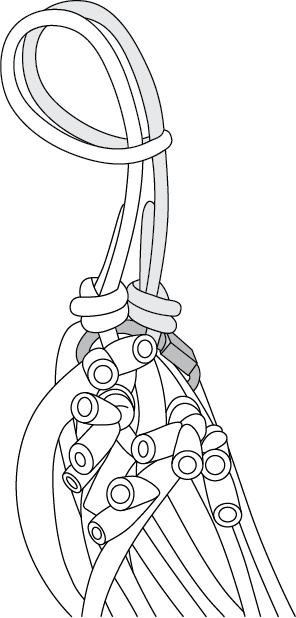
Rope loop
Connect the other end of the rubber cord to the end of the starting cable using a carabiner. The starting cable must pass through the roller. The carbine must be immured.
In a same way, attach the second rubber cord.
Put the handle of the winch reel on the axle and slide until the reinforcement mechanism clicks.
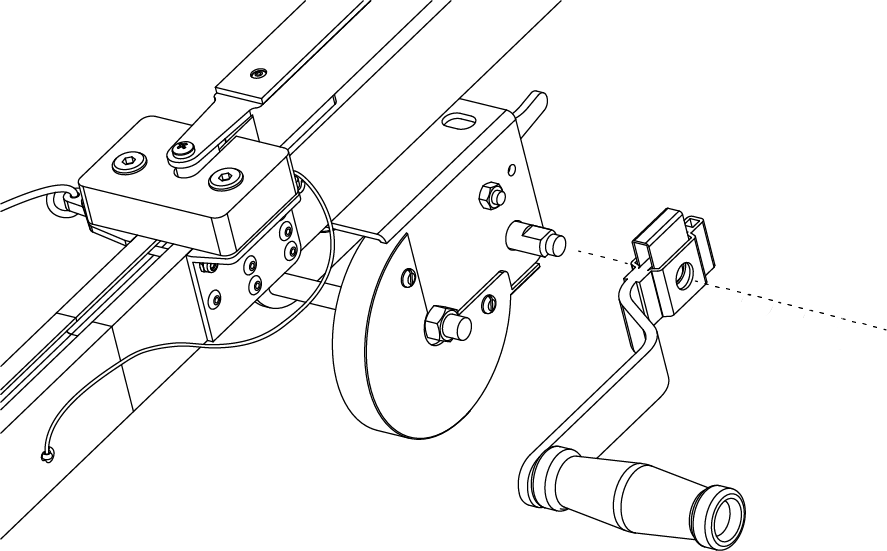
Installing the winch reel handle
Pre-launch preparation
Attention
In order to ensure the safety of the launch pad and increase the of rubber cords lifetime, do not leave them armed for more than 2-3 minutes before launch.
Switch the winch stopper to cable tension position.
Pull the rubber cords back by rotating the winch reel handle. In case of contact with the cords between the roller and the guide part of the launcher or break from the roller, it is necessary to stop the tension of the cords. Displaced bands should be placed on the roller, after which you can continue to pull the cords of the launcher.
You must stop the cords tesion when carbines as soon as carabiner reaches “STOP” marker, engraved on the middle part of the launcher.
Now you can place UAV on the launcher.
Rubber cords condition rules
Check the condition of the rubber cords regularly. If cracks and scuffs appear, replace the damaged ring with a spare ring from the spare parts kit.
Don’t keep the rubber cords stretched for a long time. Stretch the cords just before placing the UAV on the launcher.
During warm season, do not allow long-term exposure of rubber cords in direct sunlight.
During cold season, do not allow the rubber cords to freeze. Keep them in a warm place prior to installation and arm before the launch. After UAV liftoff, immediately remove the cords from the launcher and put them to a warm place.